
PJFC Solutions
PJFC Reveal user manual
The in-person sales app for photographers. Show a client's photos with music, let them choose Yes, Maybe or No, compare favourites, see wall art at true size in real rooms, build layouts, and write up the order: all on your own computer.
Download PDFFor version 0.5.5. The screenshots use a made-up studio and client.
1. Quick start
- Install PJFC Reveal from pjfcsolutions.com/download (or the Mac App Store) and open it.
- Settings opens by itself the first time. Add your studio name, logo, currency, tax and your products and prices, then press Save.
- Put the client's finished photos (JPEGs) in one folder, for example
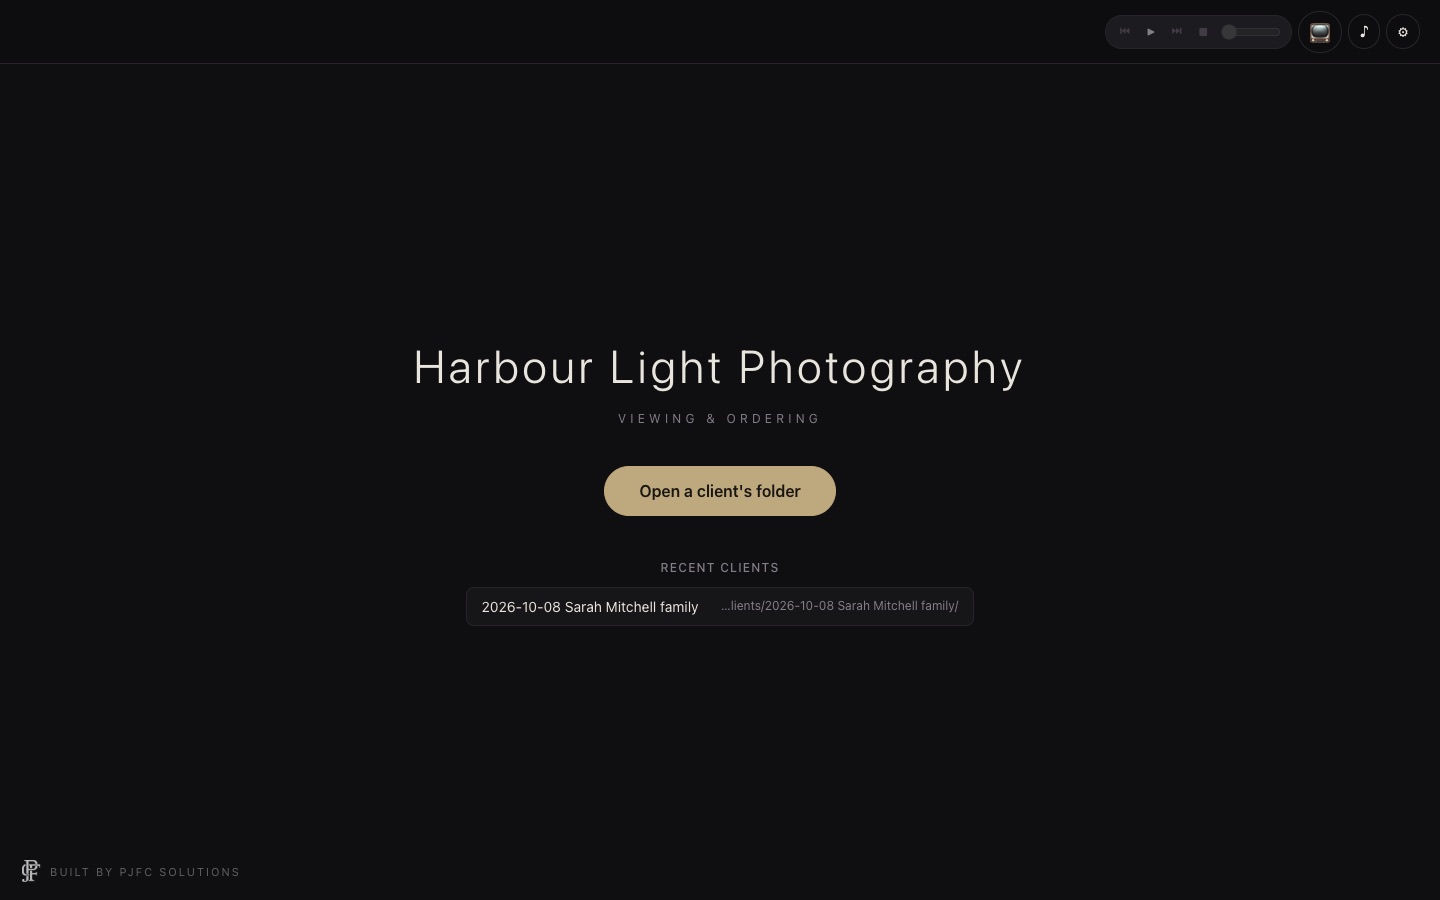
2026-10-08 Sarah Mitchell family. - Click Open a client's folder and choose that folder. The client's name is taken from the folder name.
- Plug in your TV and click 📺 to show the photos there, then press ▶ Slideshow.
- While it plays, the client says Yes, Maybe or No (keys Y M N).
- Narrow down with Compare, show sizes in Rooms, then build the Order and save it as a PDF.
Everything is saved as you go, inside the client's folder. Open the folder again later and you're right where you left off.
2. What you need
| Computer |
Mac: macOS 13 Ventura or later (Apple silicon or Intel). For older Macs (macOS 10.13 to 12) use the for older Macs download. Windows: Windows 10 or 11, 64-bit. |
|---|---|
| Photos | JPEG, PNG, WebP, GIF or AVIF files, all in one folder per client. RAW, HEIC, TIFF and PSD files aren't shown: export JPEGs first. |
| TV (optional) | Any TV or second screen plugged into the computer (HDMI, USB-C or AirPlay as an extended display). |
| Internet | Only to install, start the trial, activate your licence and get updates. The sales session itself works offline. The app checks your licence at least every 14 days. |
| Music (optional) | Built-in royalty-free songs, your own music files, or a Spotify Premium account. |
3. Install
Mac (from our website)
- Go to pjfcsolutions.com/download and download PJFC Reveal for Mac (or for older Macs if your Mac runs macOS 12 or earlier).
- Open the downloaded
.dmgand drag PJFC Reveal into Applications. - Open it from Applications or Launchpad. The app is signed and checked by Apple, so it opens normally.
Mac App Store
Search for PJFC Reveal in the Mac App Store and click Get. The App Store copy works the same way, but subscriptions and updates go through your Apple account (see section 4).
Windows
- Download PJFC Reveal for Windows from pjfcsolutions.com/download.
- Run the
.exe. If Windows shows "Windows protected your PC", click More info, then Run anyway. This is normal for new apps. - Follow the installer (you can change the install folder), then open PJFC Reveal from the Start menu.
First run
Settings opens with "Welcome to PJFC Reveal. Add your studio name, logo, currency and prices to begin." Fill in what you can and press Save; you can change everything later. See section 7.
4. Trial, licence and subscription
Free 7-day trial (website copy)
- The trial starts the first time you open the app (it needs the internet for that). No card is needed.
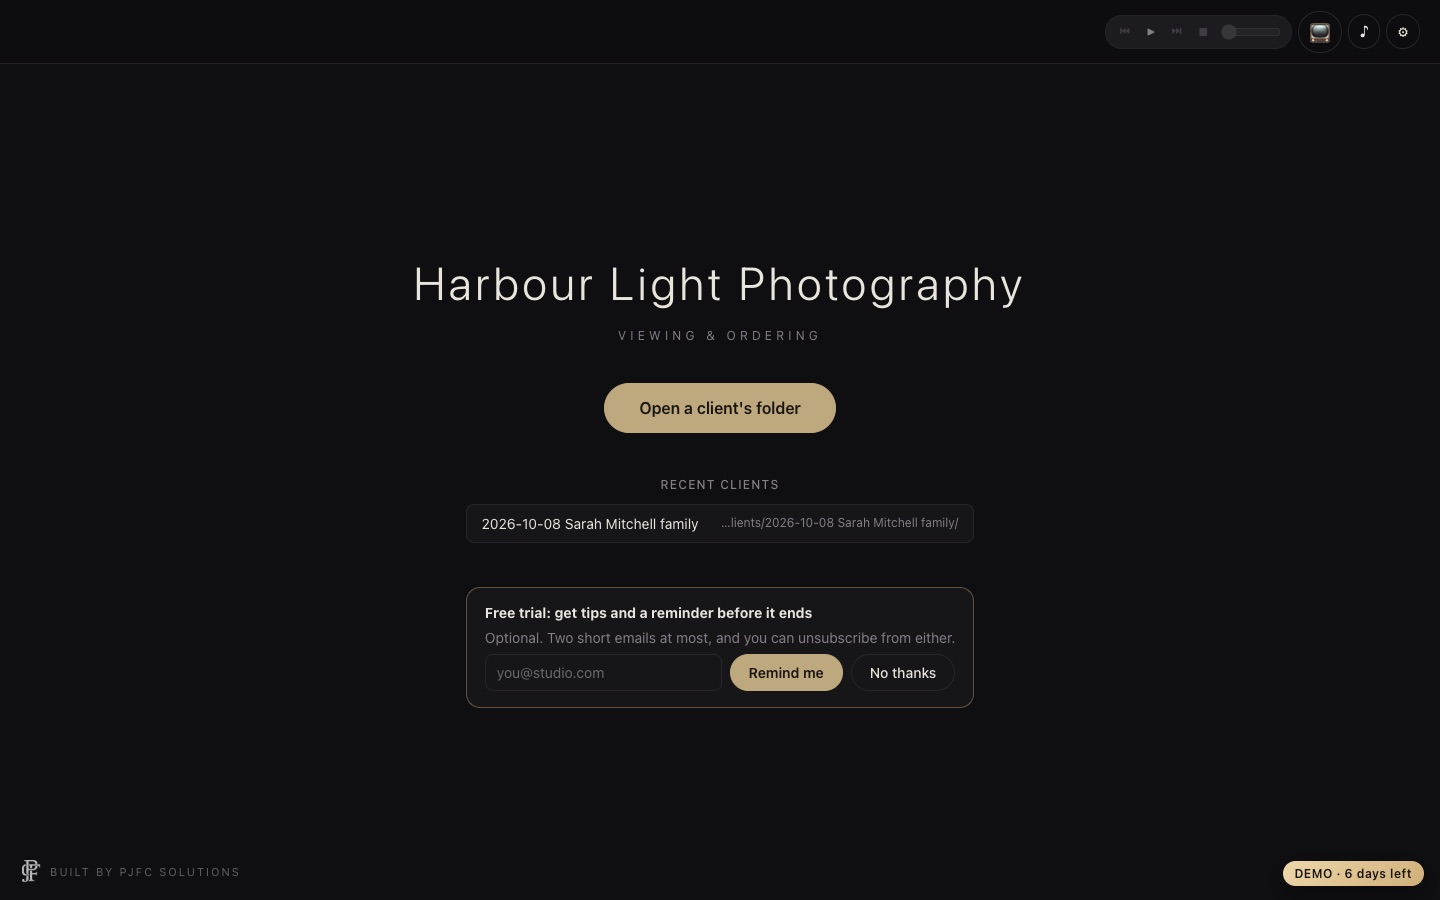
- Everything works. A small DEMO · N days left badge shows in the corner (click it to see plans).
- On the TV screen, saved PDFs and saved room or layout pictures, a large faint DEMO mark appears. Your own screen isn't marked.
- On the start screen you can ask for tips and a reminder email before the trial ends. It's optional.
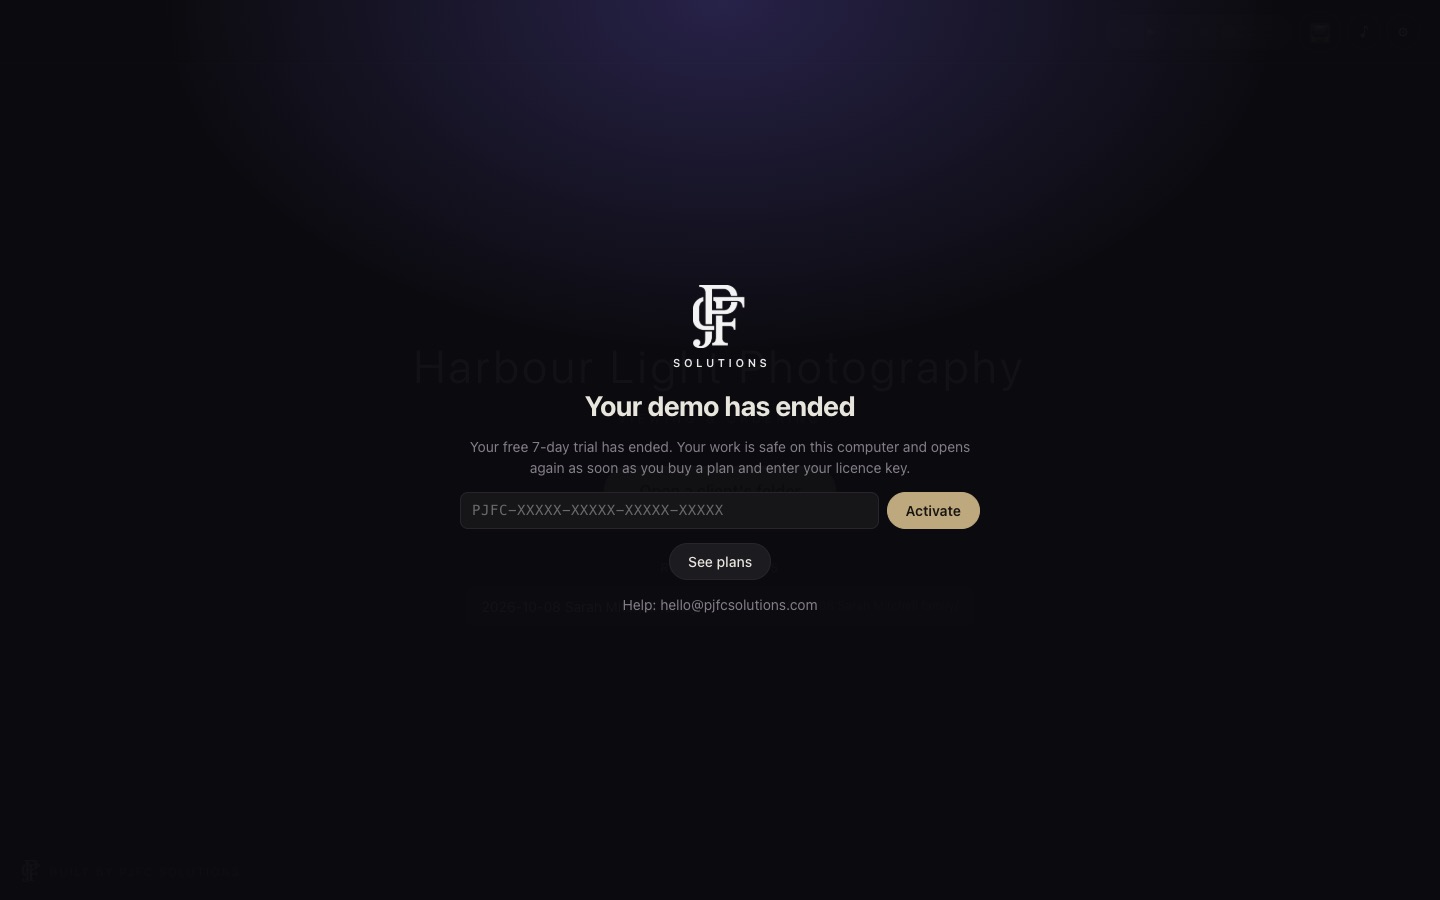
- When the trial ends the app locks. Your work stays safe in the client folders and opens again as soon as you enter a licence key.
Plans
| Plan | Computers | Price |
|---|---|---|
| Solo | 1 | US$19 a month or US$190 a year |
| Studio | Up to 3 | US$29 a month or US$290 a year |
Buy on the pricing page. One licence works on Mac or Windows. Updates are free while your plan is active.
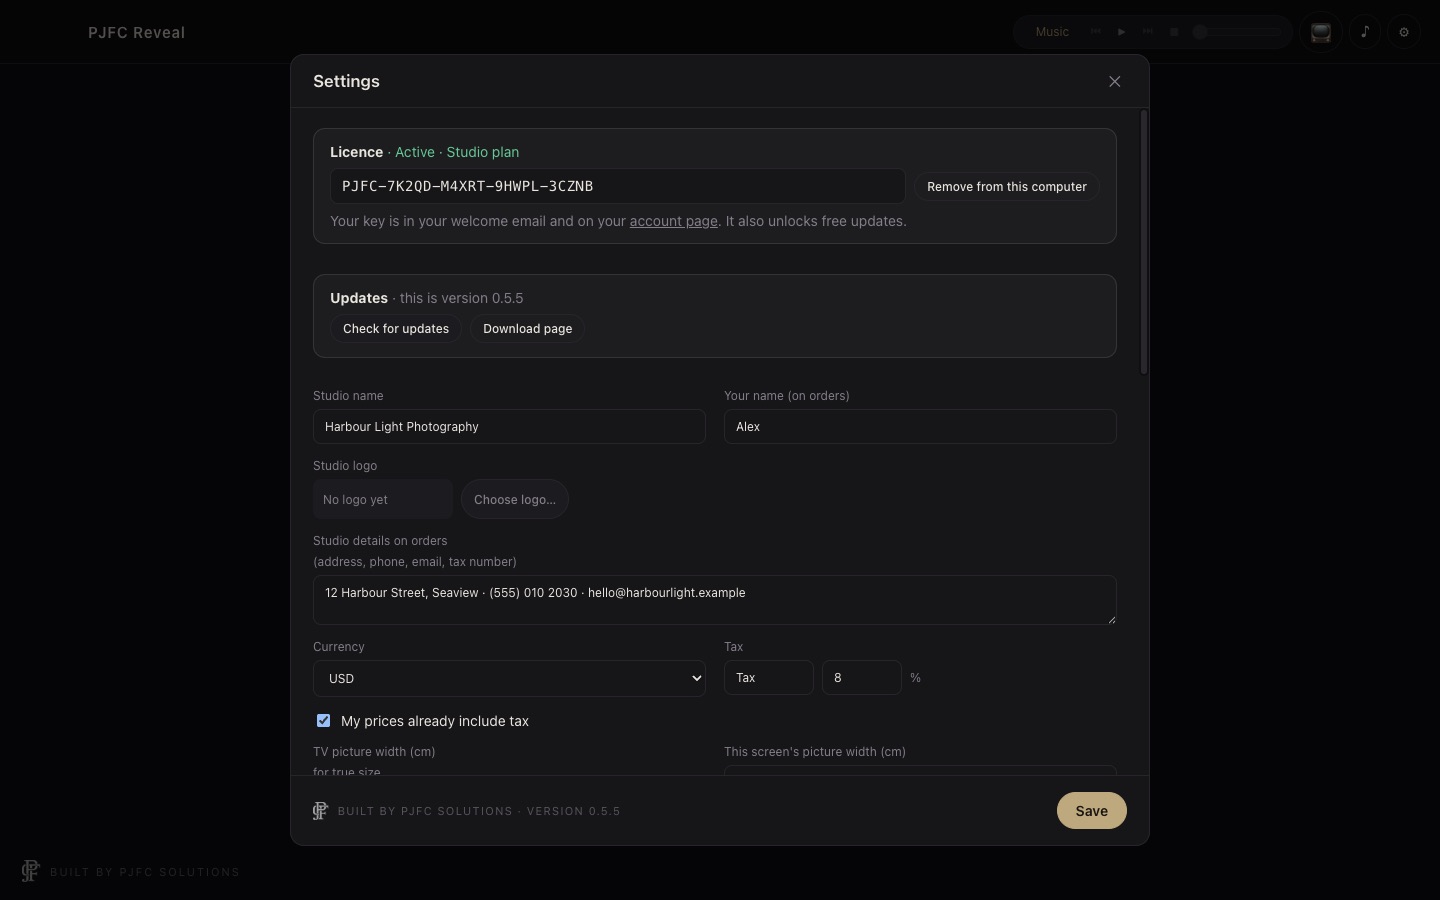
Activate your licence key
- Find your key in your welcome email or on your account page. It looks like
PJFC-XXXXX-XXXXX-XXXXX-XXXXX. - In the app, click ⚙︎ (Settings). Paste the key into the Licence box and click Activate (or use the lock screen).
- You'll see "Licence activated on this computer" and the status, for example Active · Studio plan.
Moving to another computer
In Settings › Licence click Remove from this computer. This frees the seat. Then activate the same key on the new computer. If the old computer is lost or broken, sign in to your account page and click Remove next to that computer.
Mac App Store copy
- When you first open it, choose Solo or Studio, monthly or yearly. New subscribers get 7 days free.
- Restore purchases unlocks it on another Mac with the same Apple ID.
- Manage or cancel in your Apple account (System Settings › your name › Media & Purchases › Subscriptions).
- Already bought a key on our website? Enter it on the same screen; it works in the App Store copy too.
Cancelling
Website plans: cancel any time from your account page. The app keeps working to the end of the period you've paid for. Your client folders are never touched.
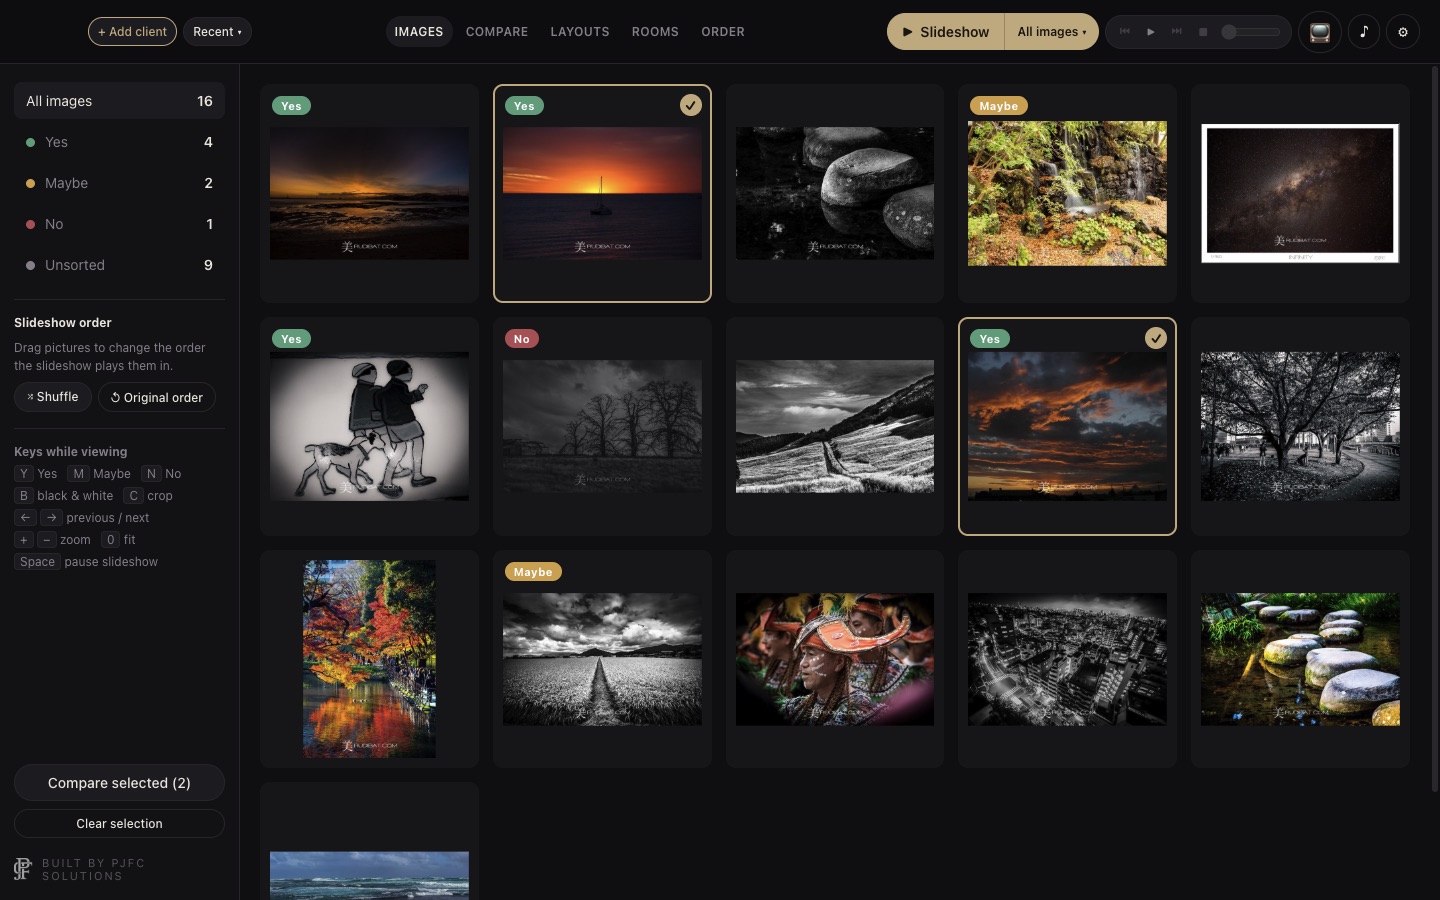
5. Tour of the screen
The bar along the top is always there once a client is open:
| Item | What it does |
|---|---|
| + Add client | Closes this client (everything is saved) and opens another client's folder. |
| Recent ▾ | Switches to one of the last 10 clients. |
| Images · Compare · Layouts · Rooms · Order | The five working screens. |
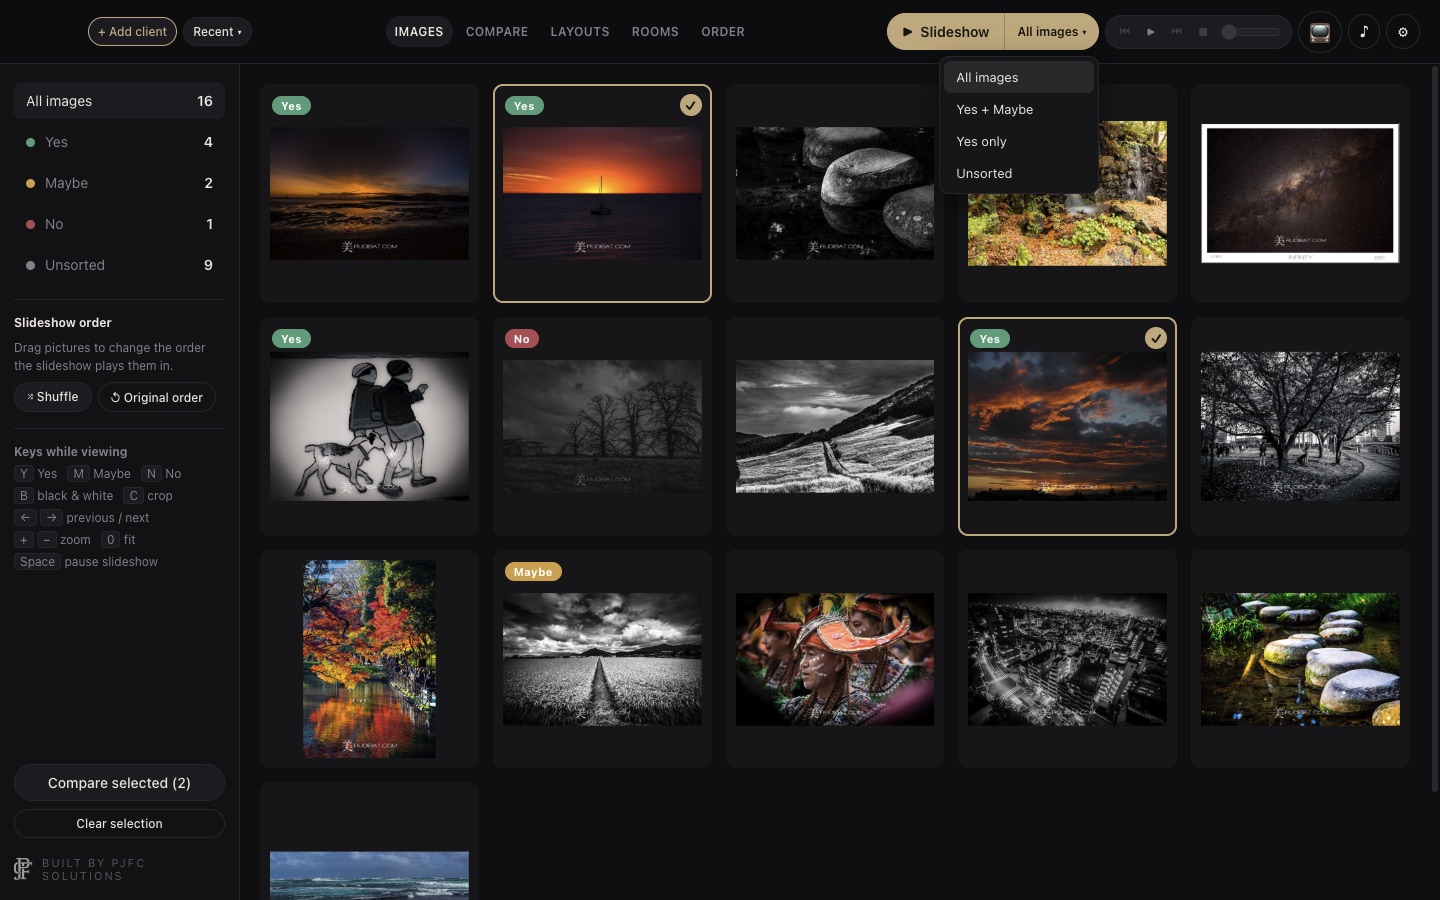
| ▶ Slideshow and All images ▾ | Plays a slideshow of All images, Yes + Maybe, Yes only, or Unsorted. |
| Music player | Back, play/pause, next, stop, position and volume. Click the song name to pick a song. |
| 📺 | Turns the client screen (your TV) on or off. |
| ♪ | Slideshow music: songs or Spotify. |
| ⚙︎ | Settings. |
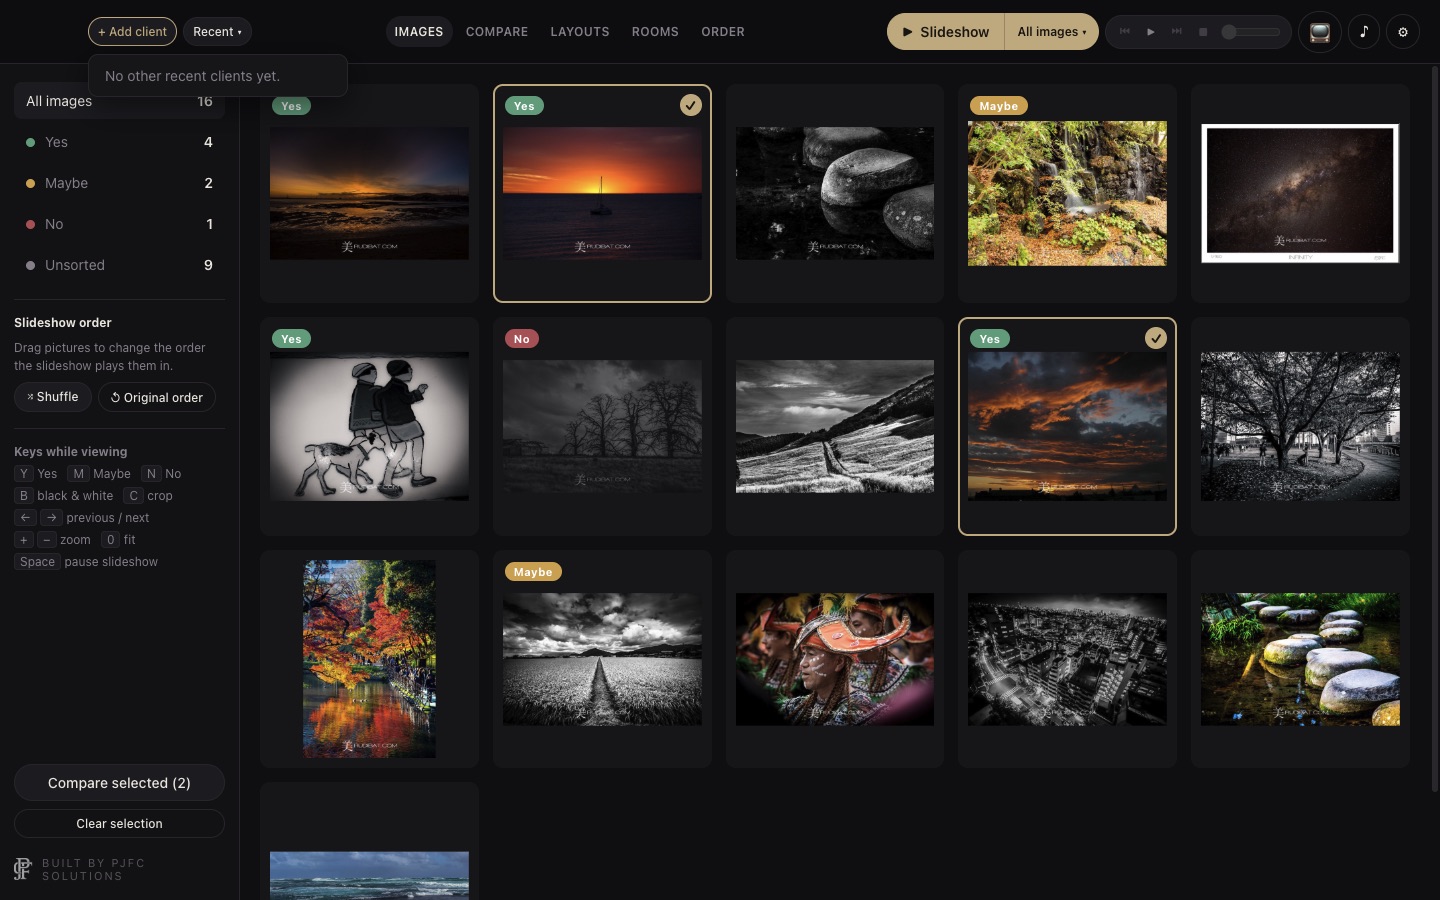
The Images screen has a side bar with the filters (All images, Yes, Maybe, No, Unsorted, each with a count), the slideshow order buttons, a list of keyboard keys, and Compare selected.
6. How to
Prepare a client folder
- One folder per client, with the finished photos at the top level. Photos in subfolders aren't shown.
- Name the folder with the date and client name, e.g.
2026-10-08 Sarah Mitchell family. The app uses "Sarah Mitchell family" as the client name. - Photos show in file-name order (IMG_2 before IMG_10). You can change the slideshow order in the app.
- The folder must allow saving: the app writes a small file called
PJFC Solutions Presentations session.jsonthere with the client's choices, plus any room and layout pictures you save. Your photos are never changed.
Open a client
Click Open a client's folder on the start screen (or + Add client) and choose the folder. Or click the client under Recent clients. The first time, thumbnails are made in the background; it gets faster after that.
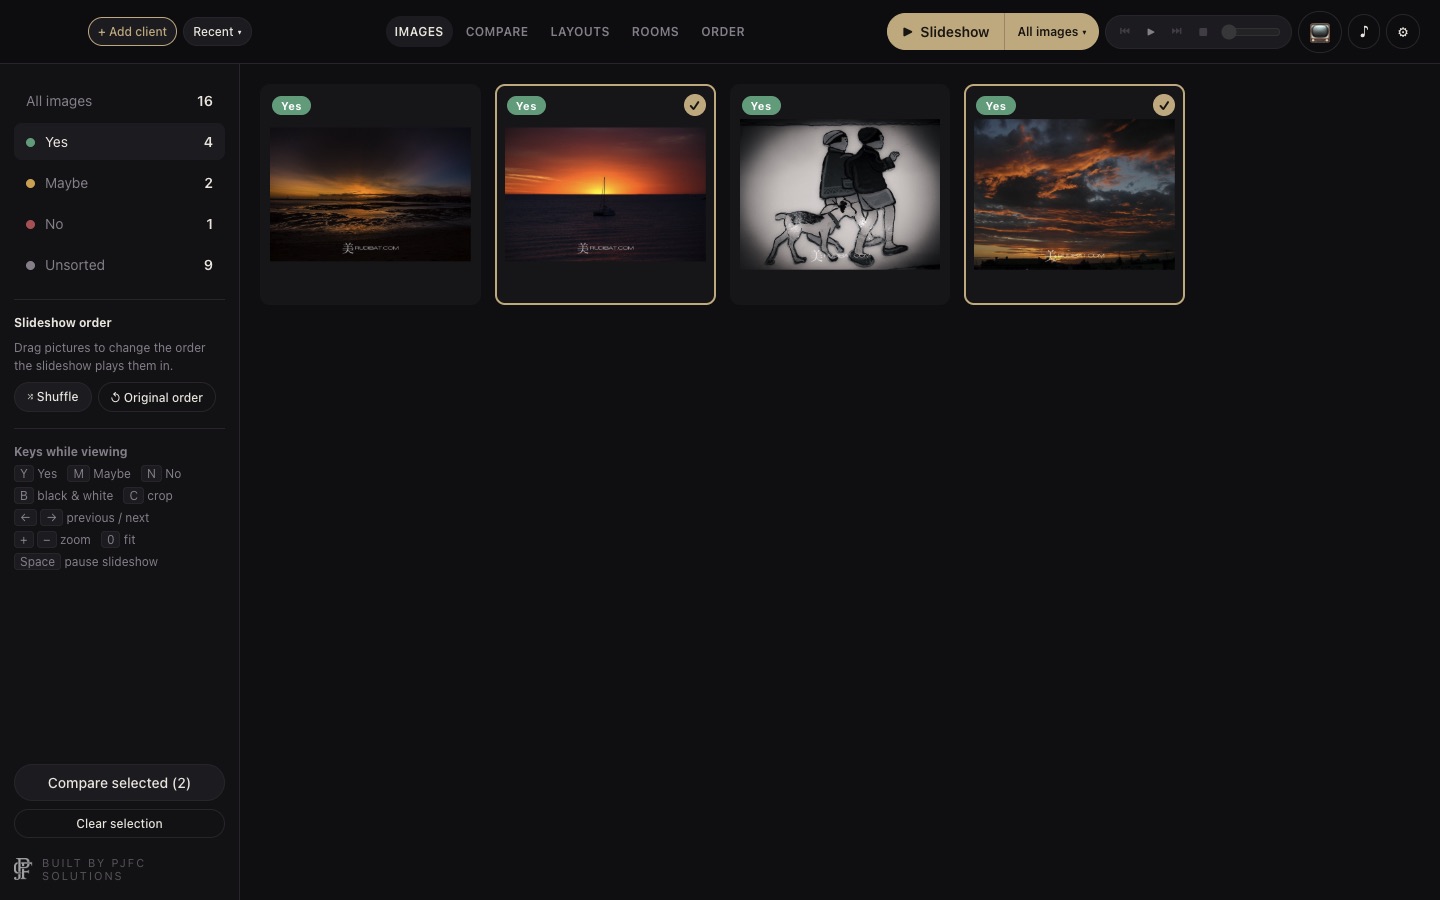
Choose Yes, Maybe or No
- On the Images screen, hover a photo and click Y, M or N. Click the same one again to clear it.
- In the big viewer or the slideshow, press Y, M, N (or 1, 2, 3).
- Use the filters on the left to see only Yes, Maybe, No or Unsorted photos.
Play a slideshow
- Choose what to play from All images ▾: All images, Yes + Maybe, Yes only, or Unsorted.
- Click ▶ Slideshow. It opens with your logo and the client's name, then plays each photo with a soft fade, and loops.
- Move the mouse to show the controls: big Yes, Maybe, No buttons, music controls, Pause and Exit.
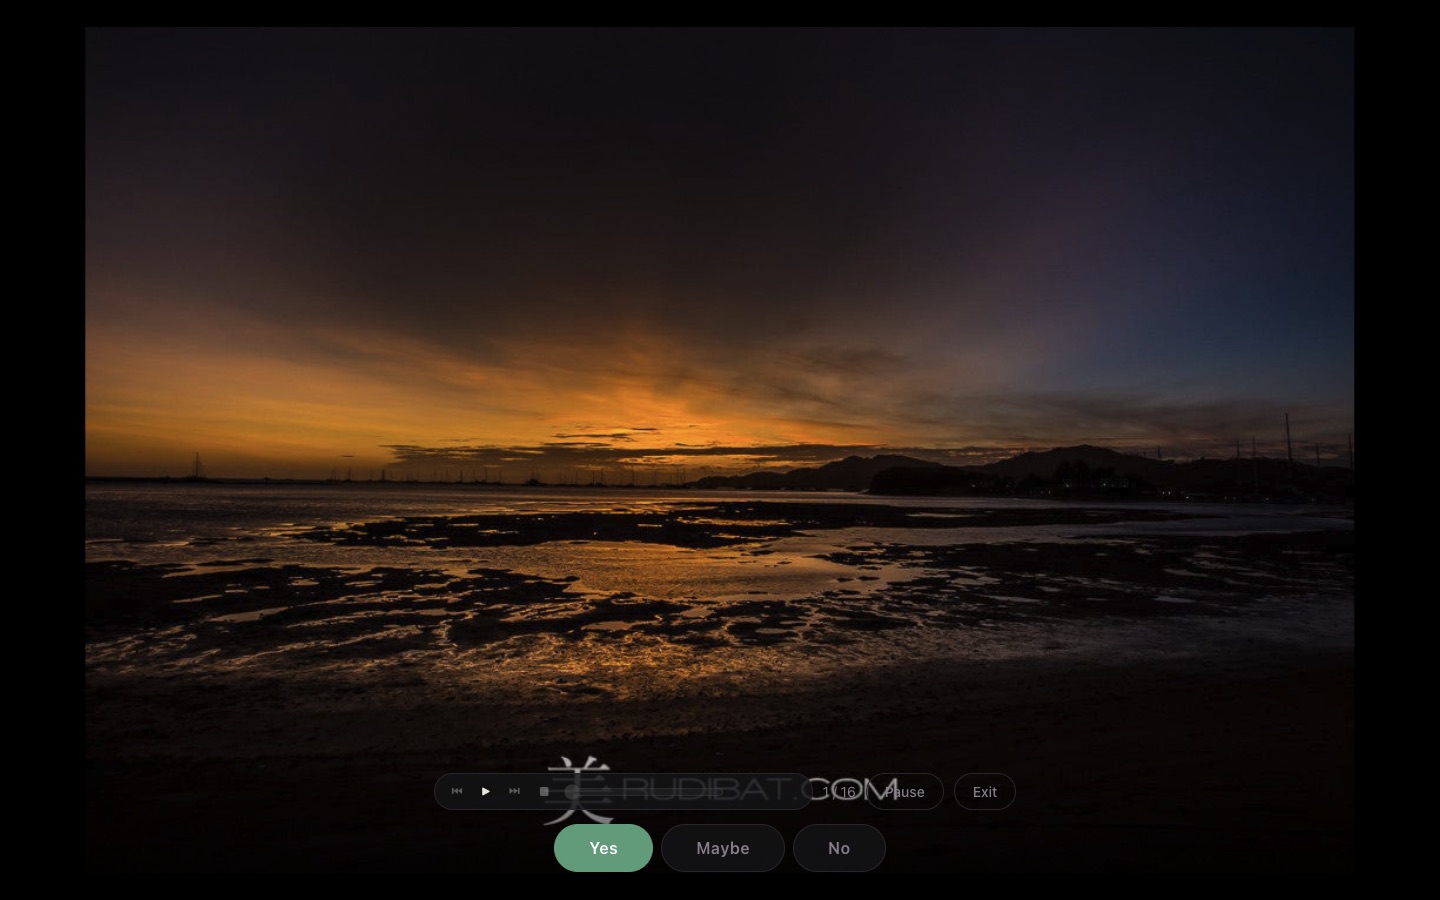
| Key | In the slideshow |
|---|---|
| Y M N | Yes, Maybe, No (the show keeps playing) |
| Space | Pause or play |
| ← → | Previous or next photo |
| Esc | Exit |
Slideshow order: on the Images screen, drag a photo onto another to move it. ⤮ Shuffle mixes them up; ↺ Original order puts them back in file-name order.
Speed and music: set Seconds per slide (2 to 20) and Play music when the slideshow starts in Settings. Music keeps playing after the slideshow ends until you press pause (❚❚) or stop (■).
Look at one photo up close
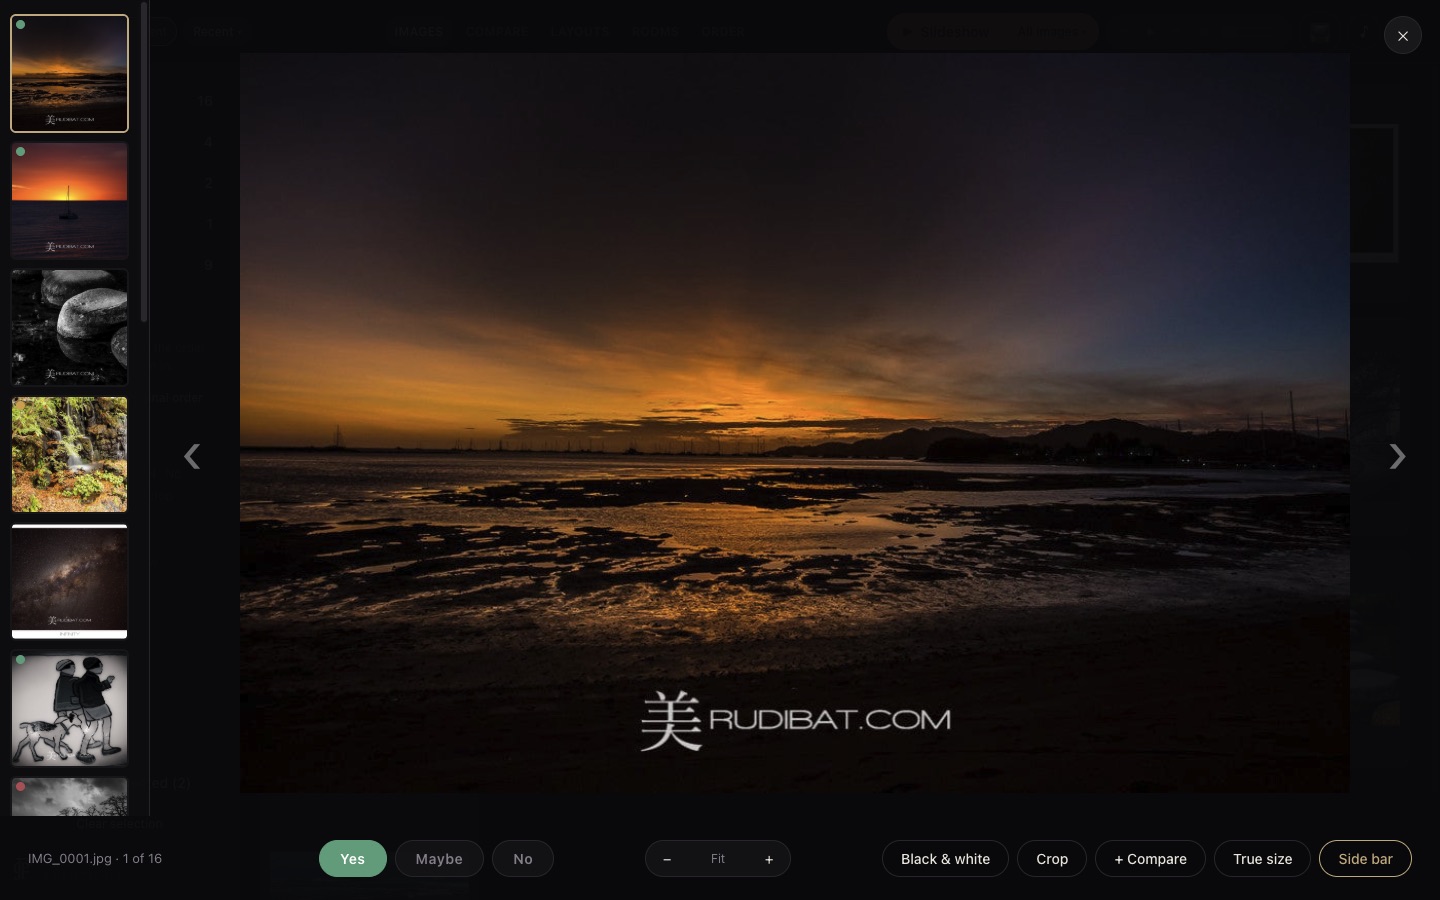
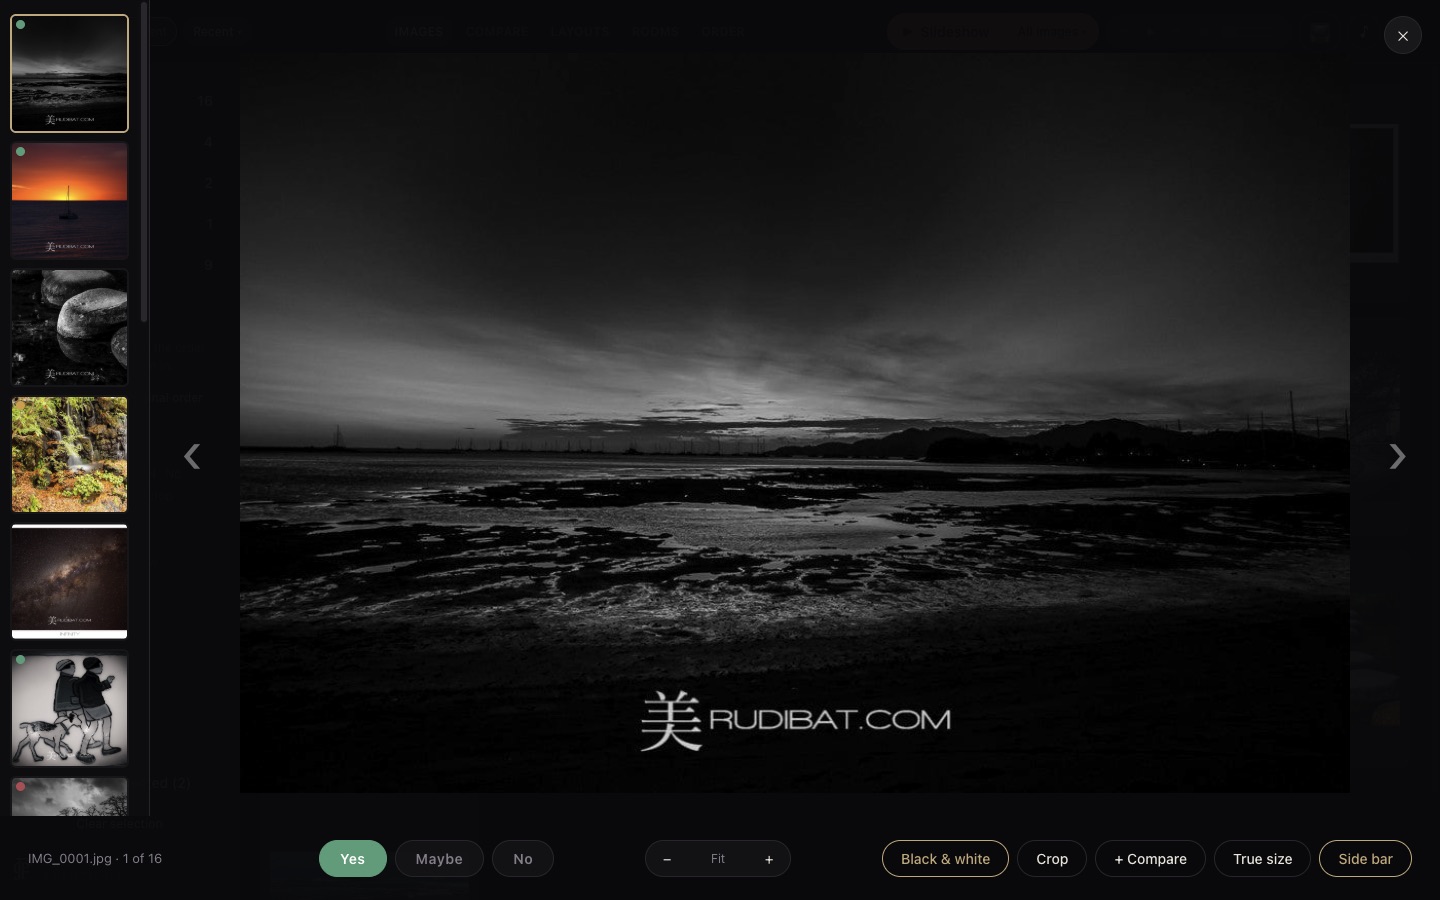
Click any photo to open the viewer. Along the bottom:
- Yes / Maybe / No.
- − Fit + to zoom. You can also use the mouse wheel or pinch on a trackpad, and double-click to zoom in or back to fit. Drag to look around.
- Black & white shows the photo in black and white (the original isn't changed).
- Crop and Remove crop (see below).
- + Compare adds the photo to Compare (up to 4).
- True size shows the photo at a real print size (see below).
- Side bar shows or hides the thumbnails down the side. Only you see them; the TV never does.
Use ← → or the ‹ › arrows to move between photos, and Esc to close.
Crop a photo
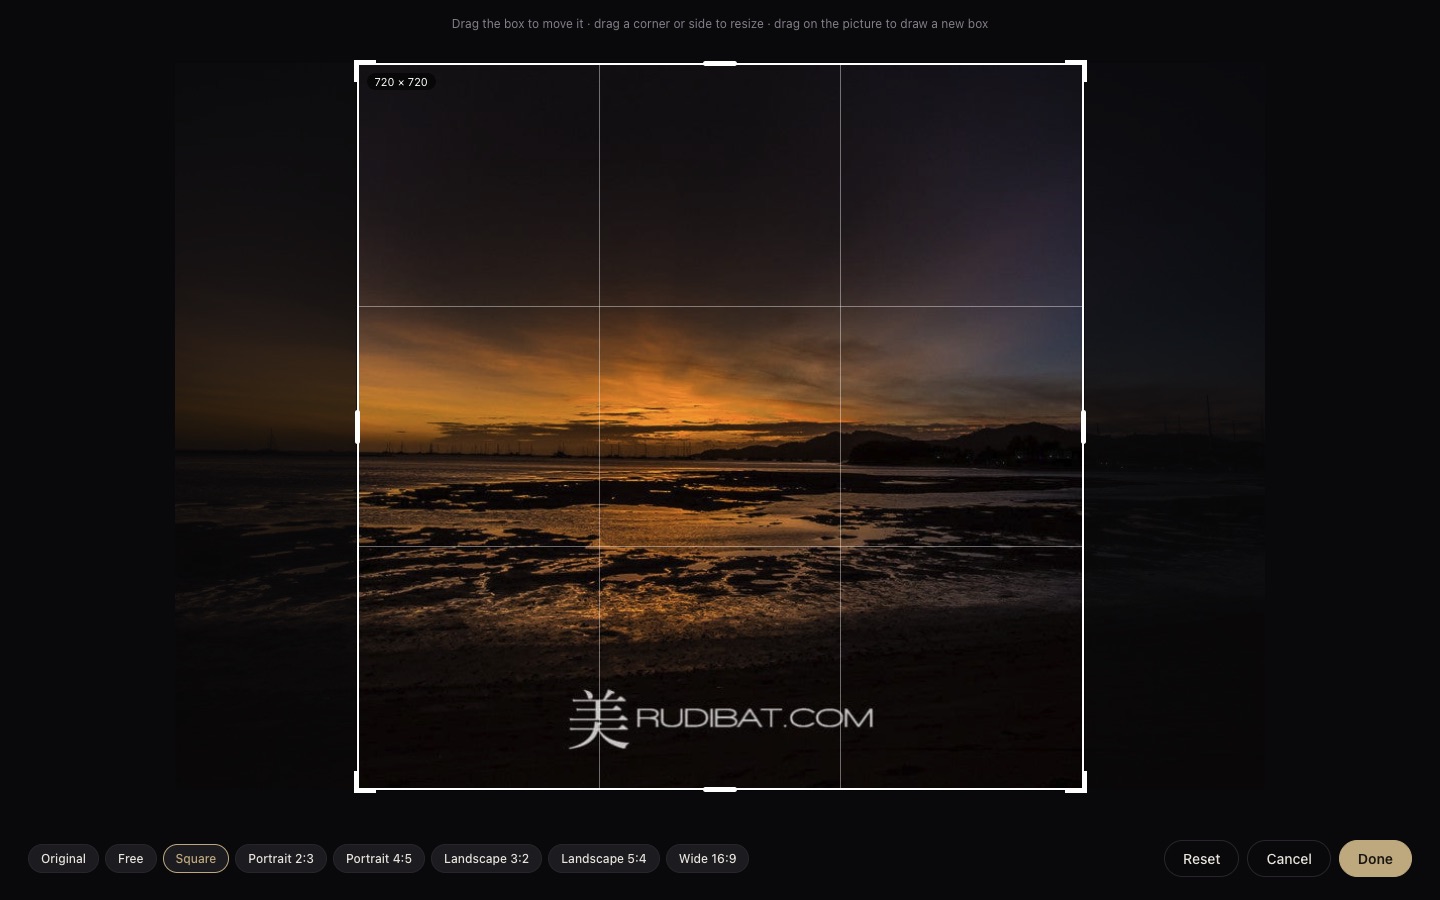
- In the viewer click Crop (or press C).
- Pick a shape: Original, Free, Square, Portrait 2:3, Portrait 4:5, Landscape 3:2, Landscape 5:4 or Wide 16:9.
- Drag the box to move it, drag a corner or side to resize, or drag on the photo to draw a new box. The pixel size shows inside the box.
- Click Done (or press Enter). Reset goes back to the whole photo; Cancel (or Esc) leaves it as it was.
The crop is used everywhere: slideshow, Compare, rooms and the TV. The original file is never changed. Remove crop shows the whole photo again.
Show a print at its real size
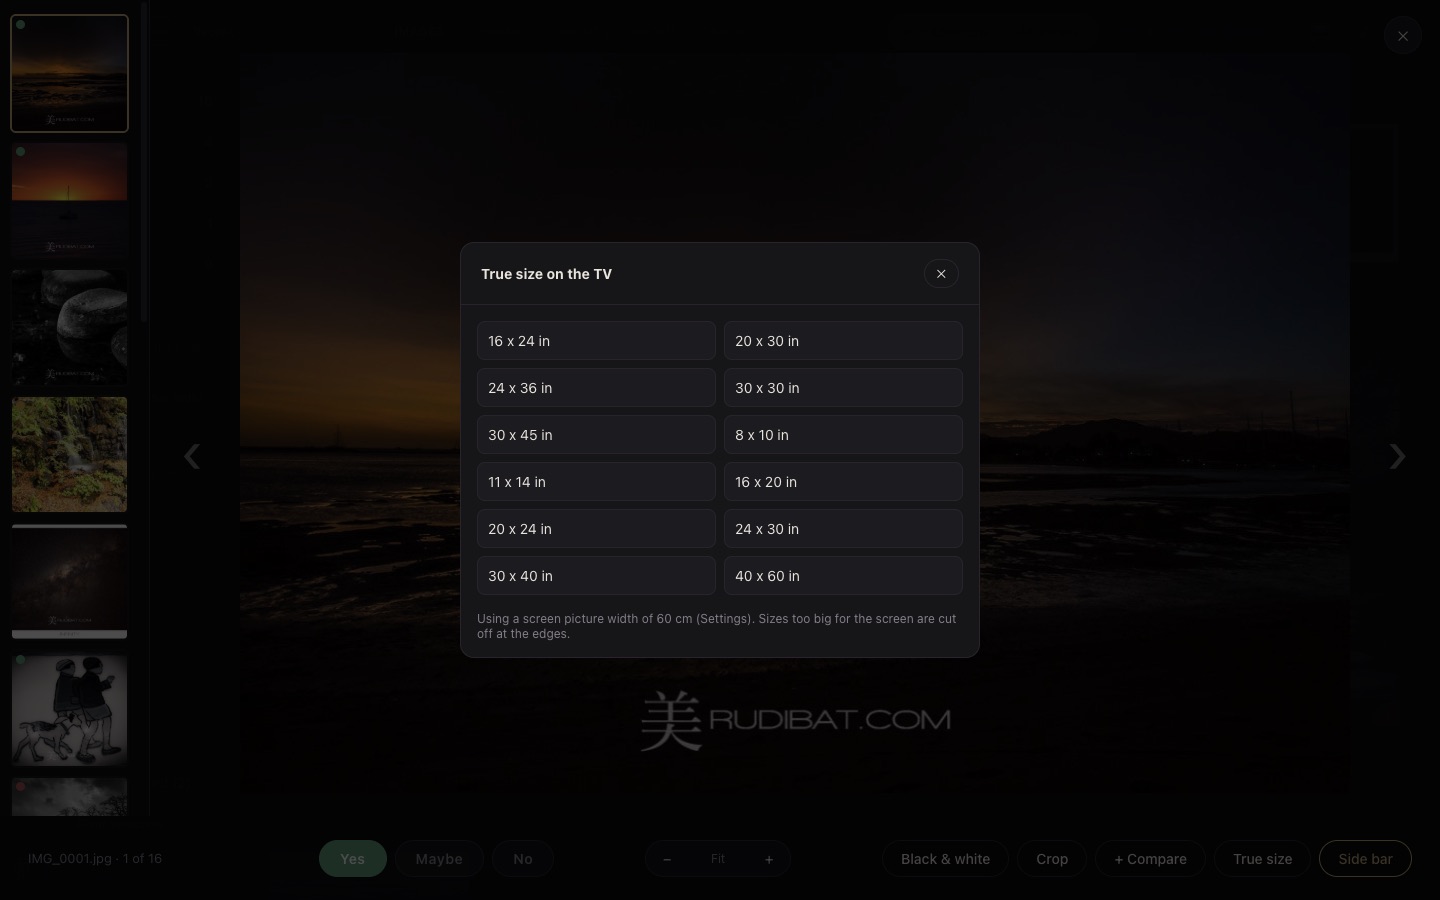
- Measure the width of the picture area of your TV in centimetres (just the lit picture, not the frame). Enter it in Settings as TV picture width (cm).
- Click Test next to it. A line shows on the TV that should measure exactly 20 cm. If it doesn't, adjust the number.
- In the viewer, click True size and pick a size. The list has your wall art sizes plus 8 x 10 up to 40 x 60 inches. It turns to match the photo (landscape or portrait).
With the TV off, true size shows on your own screen instead, using This screen's picture width (cm). Sizes bigger than the screen are cut off at the edges. Press Fit or go to the next photo to return.
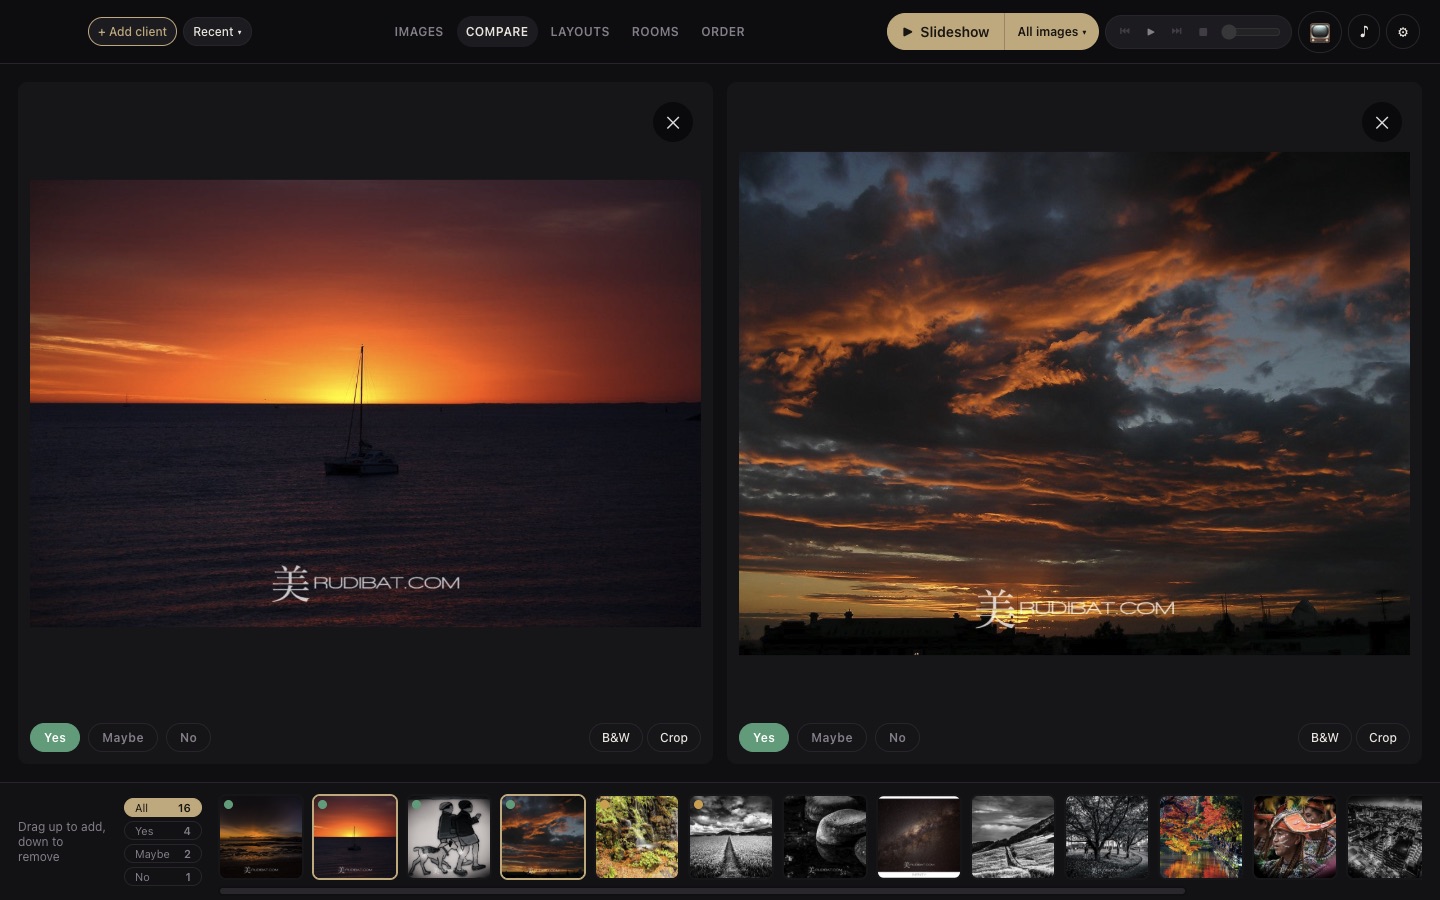
Compare favourites side by side
- On the Images screen, tick the circle on 2 to 4 photos and click Compare selected. Or click + Compare in the viewer.
- Open the Compare tab. Each photo has Yes / Maybe / No, B&W, Crop and ✕ (take out).
- The strip along the bottom has every photo, filtered by All, Yes, Maybe or No. Click a photo to add or remove it, drag it up onto a photo to swap it, or drag a photo down to remove it.
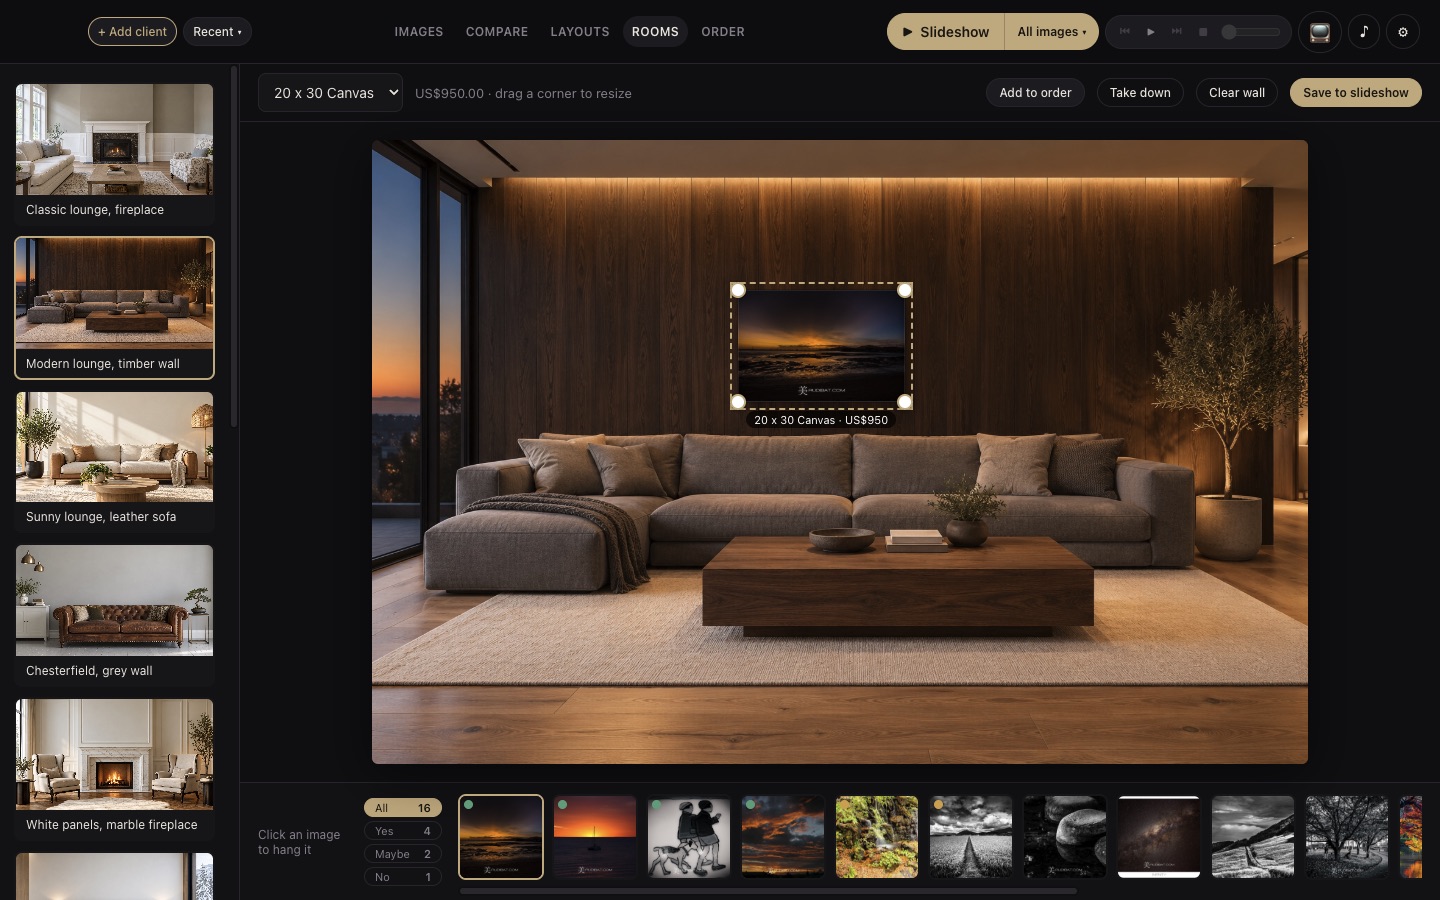
Show prints in a room
- Open the Rooms tab and pick a room on the left: 8 photo rooms (lounges, bedrooms, a hallway) and 4 drawn rooms.
- Click a photo in the strip at the bottom to hang it. Click it again to take it down. You can hang as many as you like.
- Drag a print to move it. Choose a size from the list at the top, or drag a corner to resize. Sizes snap to your price list; in between, it becomes a custom size.
- Use Line up to space several prints evenly, or Clear wall to start again.
- Add to order adds the print at its price. Save to slideshow saves a picture of the wall into the client's folder, marked Yes.
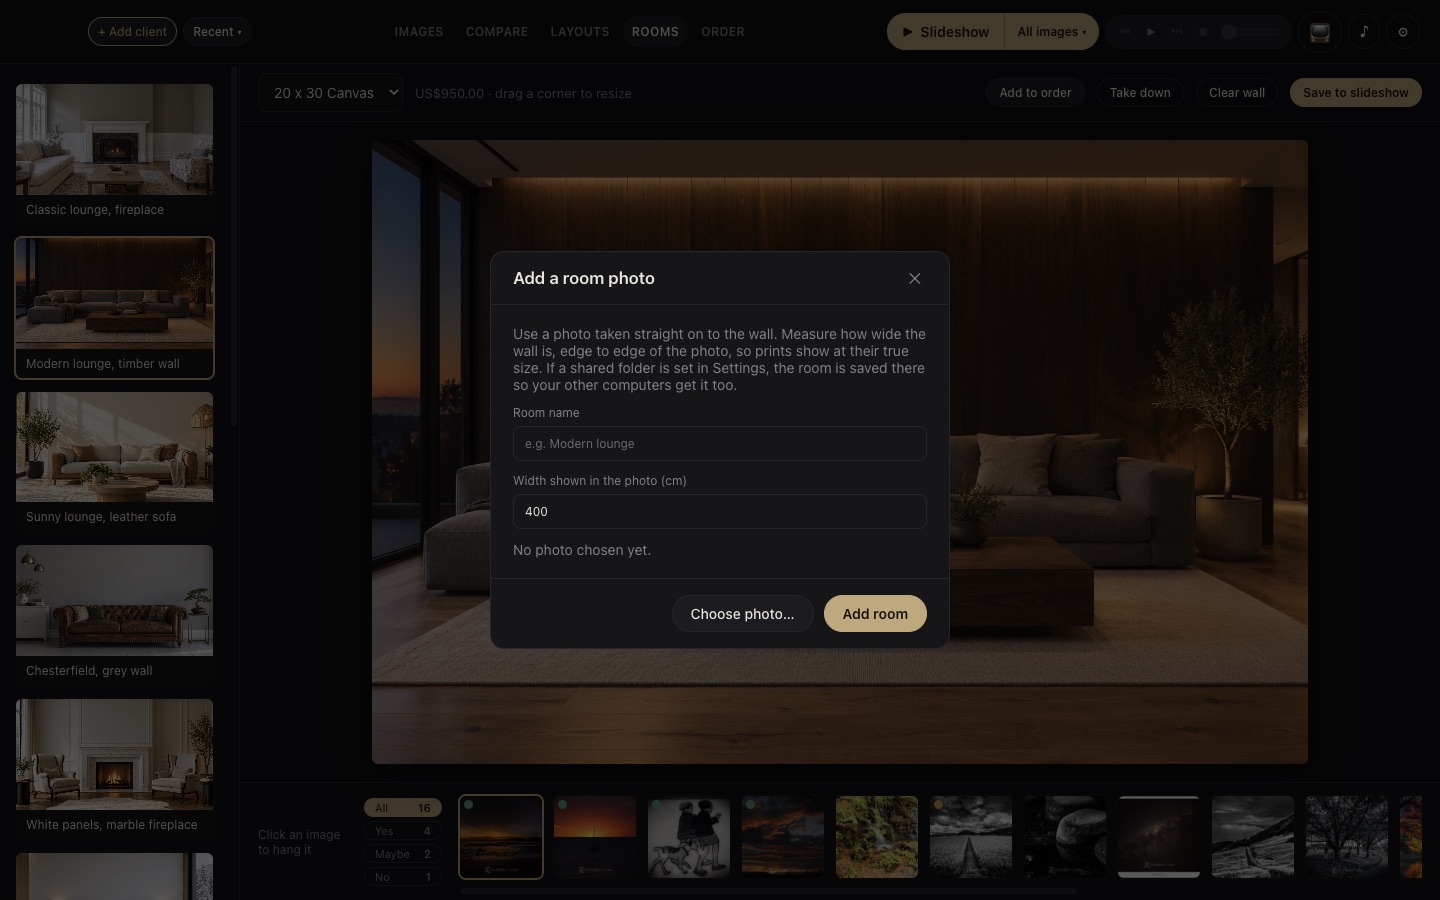
Add your own room photo
- Take a photo straight on to a wall, and measure how wide the wall is from edge to edge of the photo.
- Click + Add a room photo, give it a name, enter the width in centimetres, click Choose photo… then Add room.
- To fix the size later, click ✎ on the room. A bigger width makes prints look smaller. Built-in rooms can be hidden; your own rooms can be deleted.
Build a layout (several photos in one frame)
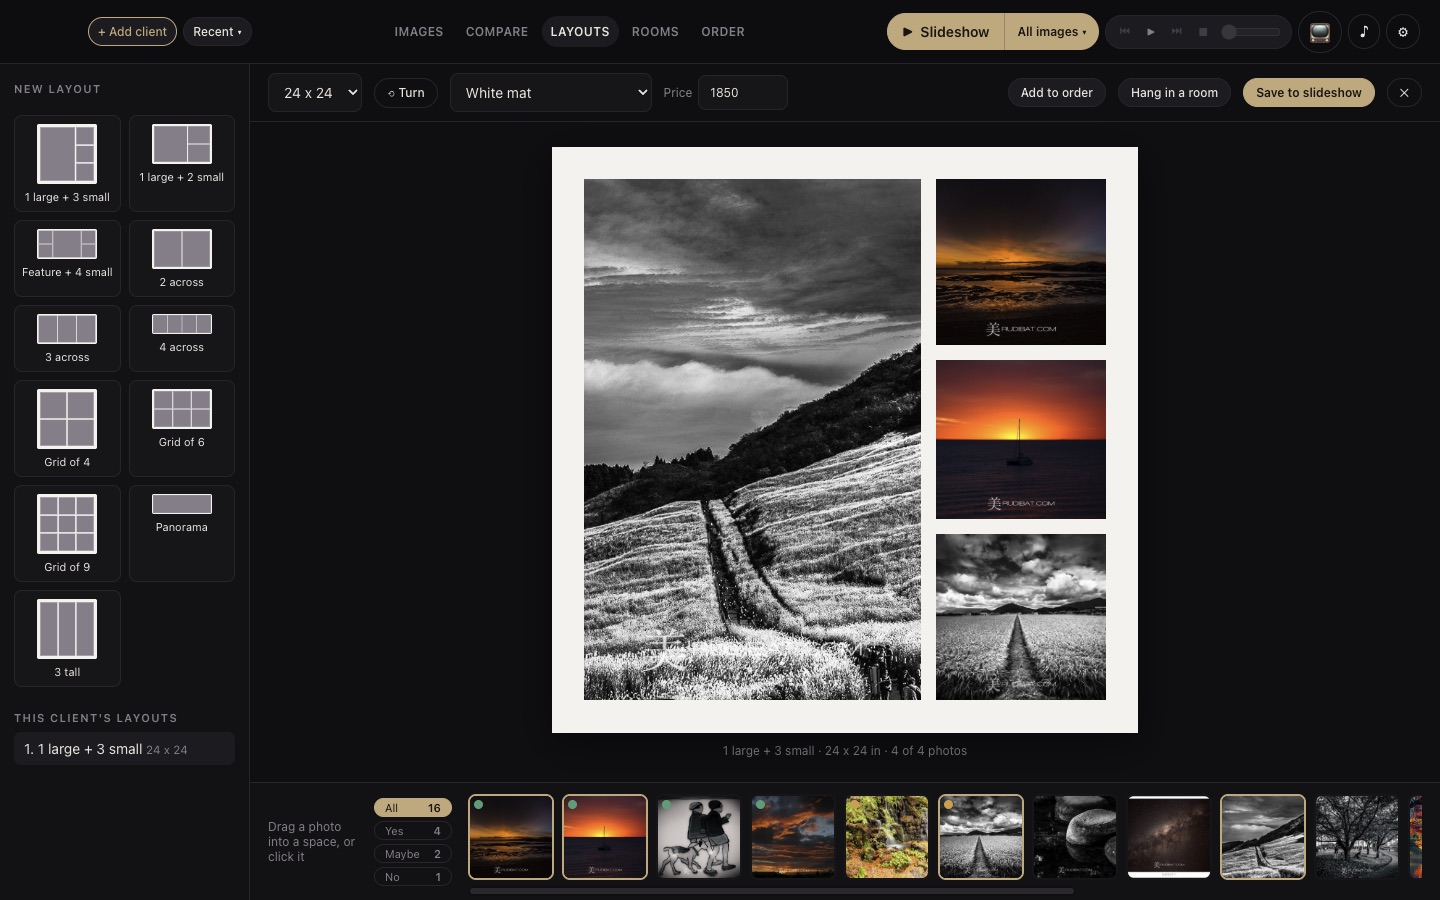
- Open the Layouts tab and pick a template: 1 large + 3 small, 1 large + 2 small, Feature + 4 small, 2/3/4 across, Grid of 4/6/9, Panorama or 3 tall.
- Drag photos from the strip into the spaces, or click a photo to fill the next empty space. Drag one space onto another to swap them.
- Click a filled space to adjust it: drag a corner to zoom, drag the photo to move it. Reset crop undoes it.
- Choose the overall size, ⟲ Turn for portrait or landscape, and the mat: White, Black, or No mat (separate prints).
- The price fills in from a wall art product of the same size; type your own if needed.
- Add to order, Hang in a room, or Save to slideshow (saves a picture into the client's folder, marked Yes).
Use the TV (client screen)
- Plug in the TV, then click 📺. The app finds the second screen and goes full screen there.
- The TV shows only the photos: no side bars, buttons or prices. It follows what you do on the Images, viewer, Compare, Rooms and Layouts screens.
- The slideshow plays full screen on the TV while you keep the controls on your screen.
- The order is hidden from the TV every time you open the Order tab. Click 📺 Show on TV when you want the client to see it.
- No second screen? The client screen opens in a window you can drag to the TV.
- Click 📺 again to turn it off.
Write up the order
- Open the Order tab. Check the client's name and add their email and mobile.
- Click products on the left to add them (use Search products for long lists). Prints and layouts you added from Rooms or Layouts are already there.
- On each line, click + Images to choose which photos it's for, and change the quantity or price if needed.
- Tick Deposit paid and enter the amount, and/or tick Less for a gift voucher or credit.
- The total and tax are worked out for you.
- Click Save as PDF for a tidy order with your logo (it opens when saved), or Export spreadsheet for a CSV file. If you've connected a CRM, click Send to CRM.
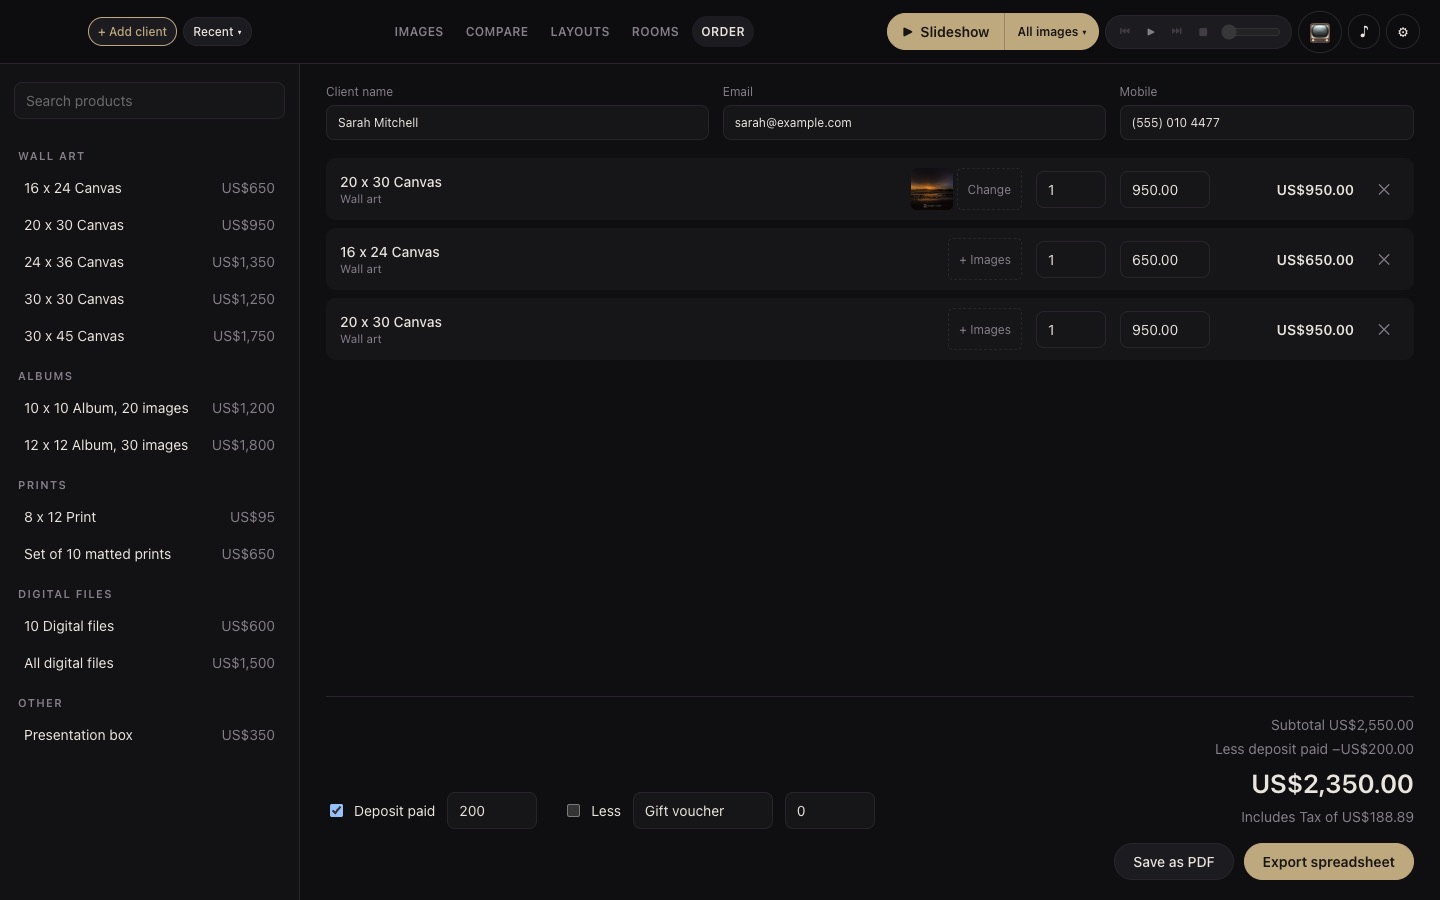
The PDF shows your logo or studio name, the client's details, the date, your name, your studio details, every item with small pictures and file names, and the totals. The spreadsheet has the columns Client, Email, Mobile, Item, Qty, Each, Amount and Images, then the totals.
Choose the music
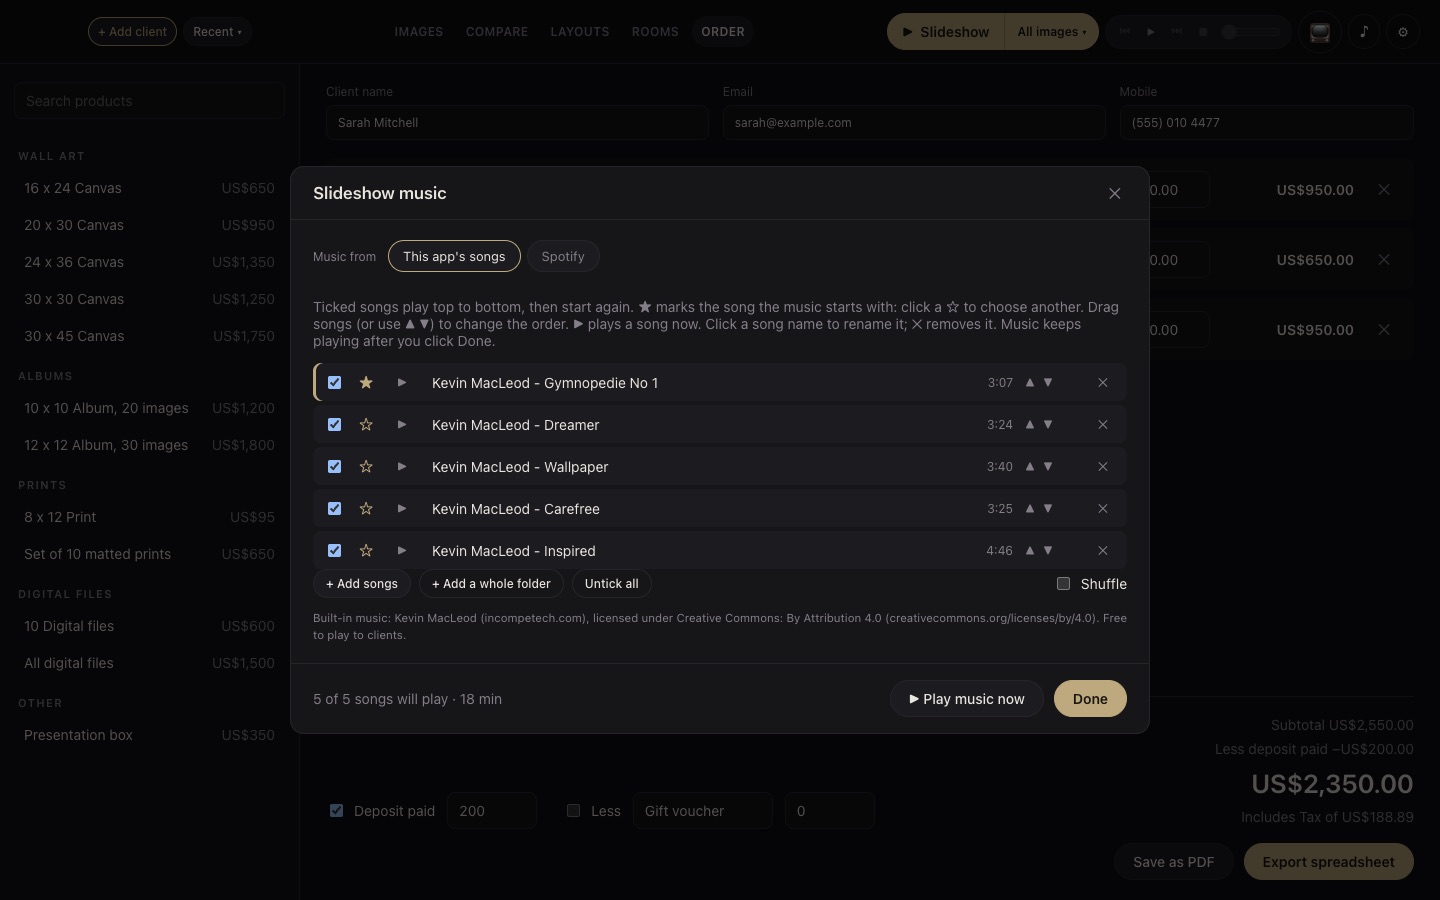
- Click ♪. Under This app's songs there are 5 built-in royalty-free songs by Kevin MacLeod that you're free to play to clients.
- + Add songs or + Add a whole folder to add your own (MP3, M4A, AAC, WAV or OGG). They're copied into the app, so they still play if the USB stick is removed.
- Ticked songs play top to bottom. ★ marks the starting song. Drag or use ▲ ▼ to reorder, click a name to rename, ✕ to remove. Tick Shuffle to mix them.
- Only play music you're licensed to play to clients. Your studio is responsible for its music.
Use Spotify (optional)
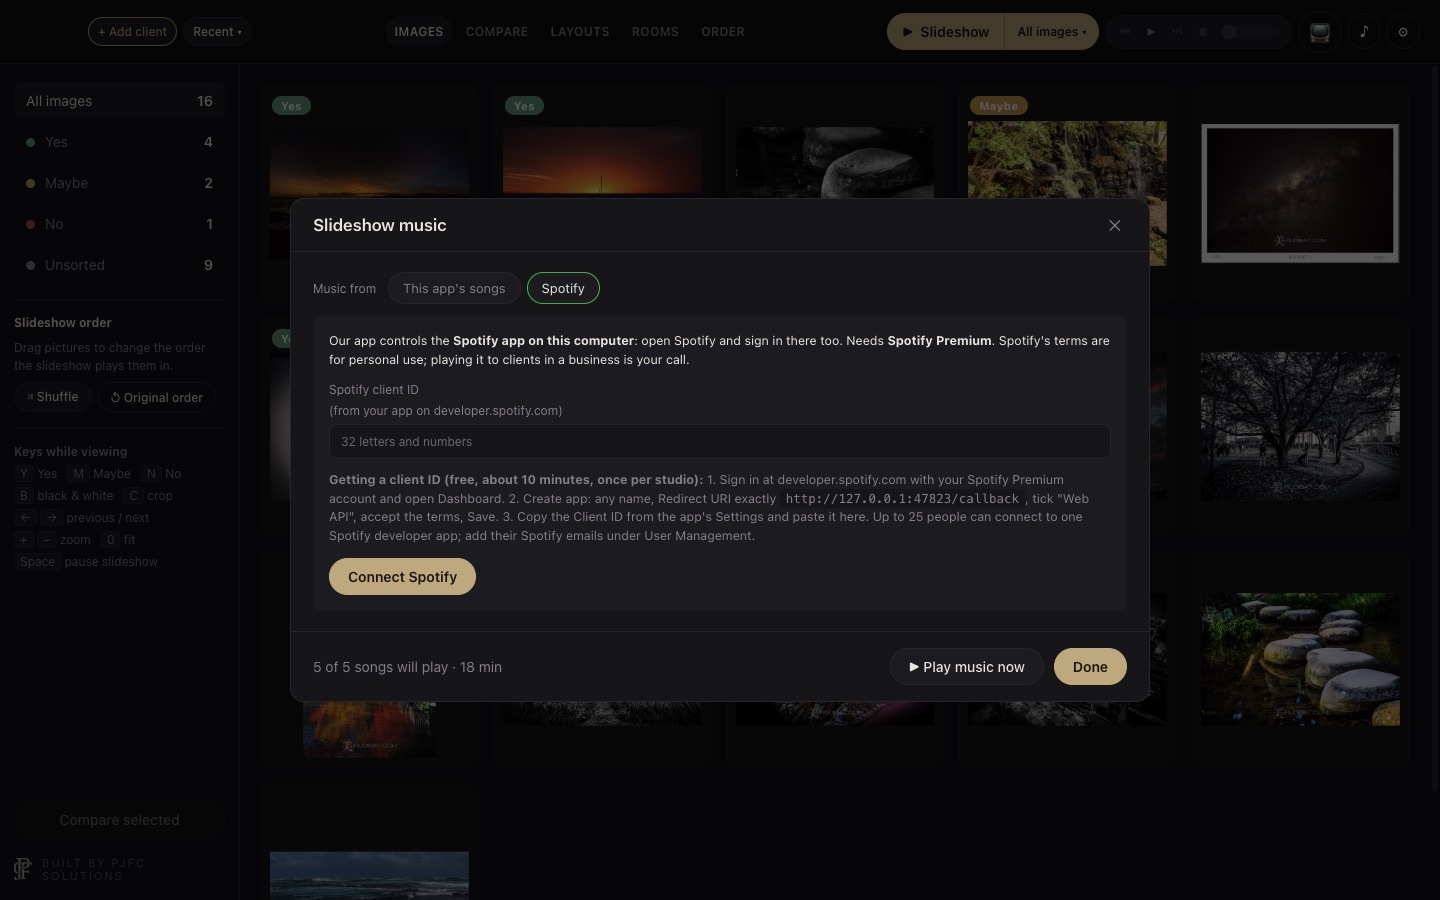
The app can control the Spotify app on your computer. You need Spotify Premium and a free Spotify developer "client ID" (about 10 minutes, once per studio):
- Sign in at
developer.spotify.comwith your Premium account and open Dashboard. - Create app: any name; Redirect URI exactly
http://127.0.0.1:47823/callback; tick Web API; accept the terms; Save. - Copy the Client ID into the Spotify panel in the music window and click Connect Spotify. Sign in in your browser.
- Choose a playlist and where to play it. The top-bar music controls now drive Spotify.
Spotify's own terms are for personal use; playing it to clients in a business is your call.
Finish with a client
There's nothing to save: every choice, crop, layout and order line is saved in the client's folder as you go. Click + Add client for the next client. The TV goes back to your logo.
7. Settings reference
Click ⚙︎. Changes take effect when you press Save; ✕ or Esc closes without saving.
| Setting | What it does |
|---|---|
| Licence | Activate your key, see your plan, or Remove from this computer. |
| Updates | Your version, Check for updates, Install now, Download page. (Not in the App Store copy.) |
| Studio name | Start screen, slideshow intro, TV and PDF. |
| Your name (on orders) | Printed on the PDF. Optional. |
| Studio logo | PNG, JPG, SVG or WebP. Used on the start screen, top bar, slideshow intro, TV and PDF. |
| Studio details on orders | Address, phone, email, tax number, printed on the PDF. |
| Currency | USD, AUD, NZD, CAD, GBP or EUR. |
| Tax | Name (e.g. GST, VAT, Tax) and rate %. 0 means no tax line. |
| My prices already include tax | On: the total includes tax and the PDF says "Includes GST of…". Off: tax is added on top. |
| TV picture width (cm) + Test | For true size on the TV. Test shows a 20 cm line. |
| This screen's picture width (cm) | For true size on your own screen. |
| Seconds per slide | 2 to 20 (default 5). |
| Play music when the slideshow starts | Off by default. |
| Shared folder for rooms | Optional Dropbox or network folder so several computers share your own room photos. |
| Connect your CRM | Send orders to VSCO Workspace (Táve), or to Zapier, Make or a webhook (for HoneyBook, Dubsado, Studio Ninja, 17hats, Sprout Studio and others). See below. |
| Products & prices | Name, group and price of everything you sell. + Add product, ✕ to remove, or Import from spreadsheet (CSV)…. |
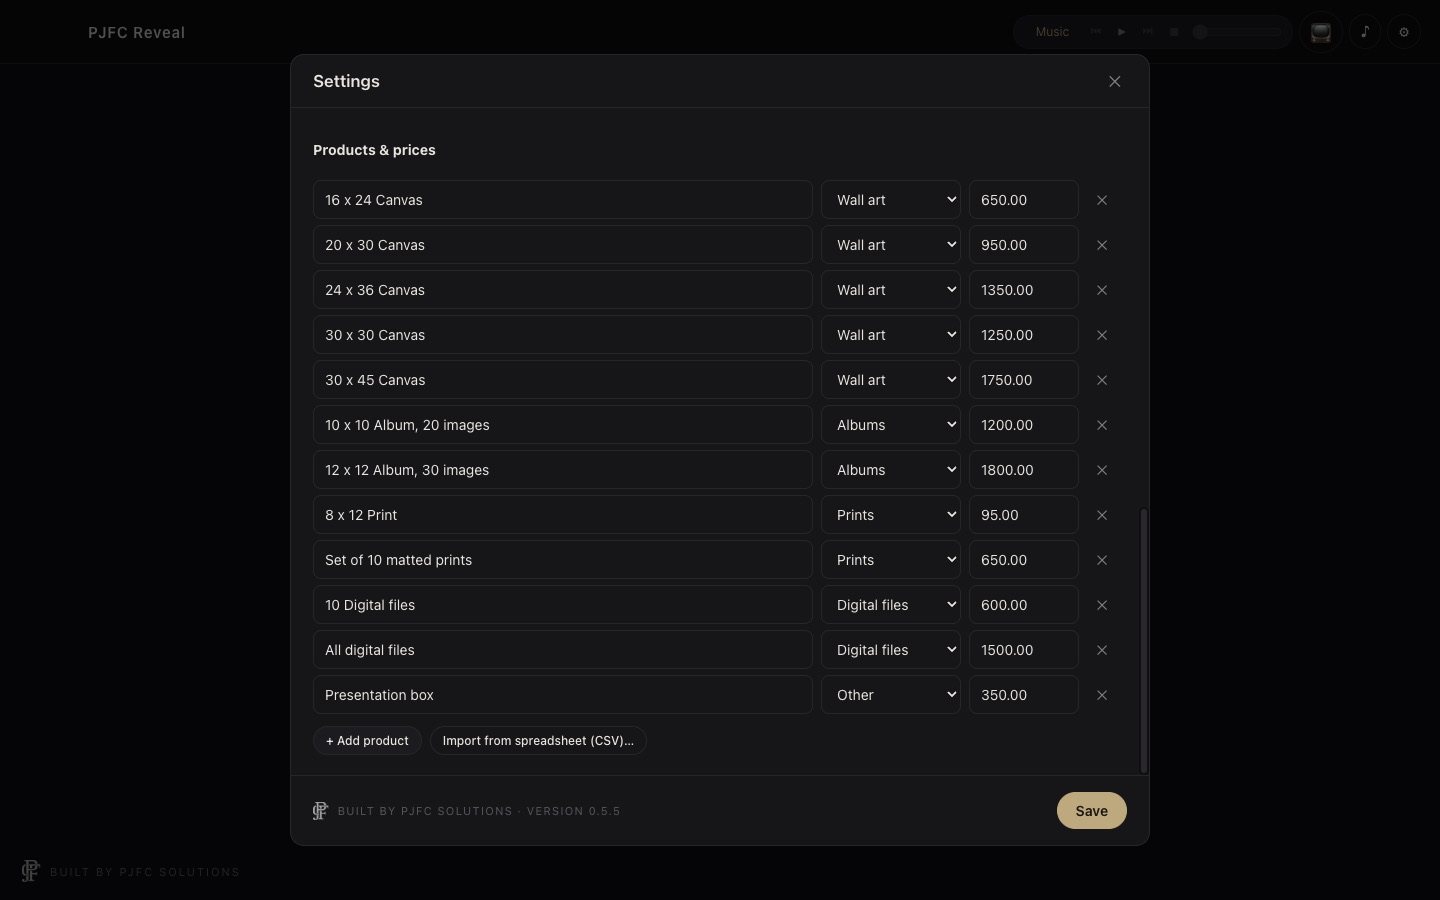
Products and wall art sizes
- Groups: Wall art, Albums, Prints, Digital files, Add-ons, Other.
- Wall art products need a size in the name, like
20 x 30 Canvas(inches, width x height), so they appear in Rooms, True size and layout prices. Put them in the Wall art group. - The app starts with sample products (canvases, albums, prints, digital files, a presentation box). Change the prices or remove them.
Import products from a spreadsheet
Save your price list as CSV with a header row. The app finds columns called name (or product, item, description, title), price (or amount, retail, cost, rate) and group (or category, type, collection). Existing products with the same name get the new price; new ones are added. Press Save afterwards.
Connect a CRM
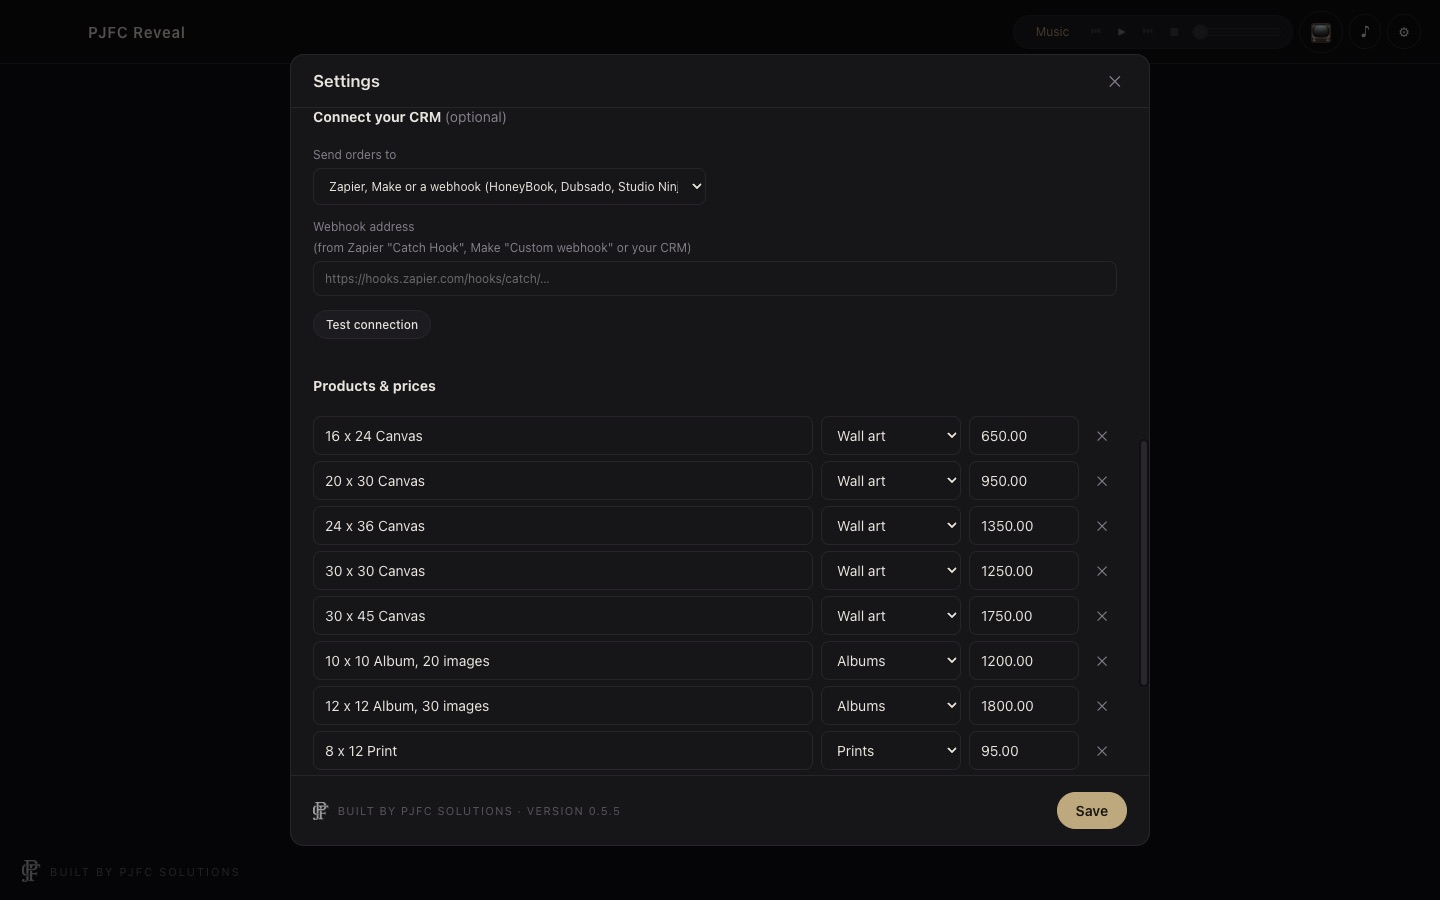
VSCO Workspace: in VSCO Workspace go to Settings › API Integrations › New API Key, and paste the key into Reveal. Import products brings in your VSCO products and prices. Send to VSCO Workspace on the Order screen creates a new job ("client name: in-person sales") with the client and an order of the items. Deposits, credits and pictures aren't sent. This connection is new: please tell us how it goes.
Zapier, Make or a webhook: in Zapier make a "Catch Hook" (or in Make a "Custom webhook") and paste its address (starting with https://). Send to CRM sends the order as JSON: studio, currency, client (name, email, phone), lines (name, qty, price, images), totals and a note. Amounts are in cents. Use Zapier or Make to pass it to your CRM.
Click Test connection to check it works.
8. Tips and tricks
- Lead with the slideshow. Play Yes + Maybe a second time with music after the first pass; clients often upgrade Maybes.
- Hide the order from the TV until you're ready. It's hidden by default each time you open Order.
- Use the client's own room. Ask them to send a photo of their wall before the session and add it as a room. Seeing their own lounge sells bigger sizes.
- Show true size on the TV for the size they're unsure about. Measure the TV once and check with Test.
- Save to slideshow from Rooms and Layouts, then replay Yes only: the wall views play in the slideshow too.
- Export at about 3000 px (long side) for the fastest loading, especially on older computers. Bigger photos work but the first open takes longer.
- Open the folder before the client arrives so thumbnails are ready.
- Keys: Y M N rate, B black & white, C crop, + − zoom, 0 fit, ← → move, Esc close.
- Several computers? Use the shared folder for rooms, keep client folders on Dropbox or a network drive, and don't open the same client on two computers at once.
- Put your price list in a spreadsheet and import it, so every computer has the same prices.
9. Troubleshooting
| Problem | Fix |
|---|---|
| "There are no JPEG or PNG images in that folder." | The photos are in a subfolder, or they're RAW or HEIC files. Put JPEGs at the top level of the client's folder. |
| "That folder can no longer be found." | The folder was moved or renamed, or the drive isn't plugged in. Click Open a client's folder and choose it again; the client's choices travel with the folder. |
| "Couldn't save to the folder" | The folder is read-only, the drive is full, or the network drive dropped out. Copy the folder to your computer and open it from there. |
| Photos are slow to open | The first open makes thumbnails in the background; wait a minute. Export smaller JPEGs (about 3000 px) for older computers. |
| Windows says "Windows protected your PC" | Click More info, then Run anyway. |
| The Mac app won't open on an older Mac | Use the for older Macs download (macOS 10.13 to 12). |
| The TV shows nothing, or the wrong screen | Plug the TV in before clicking 📺, and set it as an extended display (not mirrored) in your computer's display settings. Click 📺 off and on again. |
| True size is the wrong size | Re-measure the TV's picture area (not the frame) in cm, enter it in Settings and click Test: the line should be exactly 20 cm. |
| A print size isn't in Rooms or True size | The product needs a size in its name (e.g. 20 x 30 Canvas) and to be in the Wall art group. |
| Music keeps playing after the slideshow | That's by design. Press ❚❚ or ■ in the top bar. |
| No music plays | Click ♪ and make sure at least one song is ticked. Check the volume slider and your computer's volume. |
| "Spotify isn't open on this computer." | Open the Spotify app, play any song for a second, then try again. |
| "controlling playback needs a Spotify Premium account" | Spotify only allows control with Premium. |
| "Spotify sign-in has expired." | Click Disconnect, then Connect Spotify again. |
| "That doesn't look like a licence key." | Copy the whole key from your welcome email, starting with PJFC-. |
| The licence server says no seats are left | Remove the licence from a computer you no longer use (Settings or your account page), or move up to Studio. |
| "Connect to the internet so the app can check your licence" | The app needs to go online at least every 14 days. Connect and click Try again. |
| "Your computer's date looks wrong." | Set the date and time to automatic, then connect to the internet. |
| The update didn't install | Check the internet and try again from Settings › Updates, or download the latest version from the download page and install it over the top. Your settings and clients are kept. |
| "Not sent" when sending to a CRM | Check the API key or webhook address in Settings and click Test connection. A webhook address must start with https://. |
| "Add at least one product first." | Add a product to the order before saving a PDF, exporting or sending. |
| App Store: "This Mac needs your OK to open that folder again." | Click Open a client's folder and choose the folder once more. |
10. FAQ
Do I need the internet in the sales room?
No. Everything runs on your computer. The app goes online only to check your licence (at least every 14 days) and for updates.
Does it change my photos?
Never. Crops and black & white are stored as instructions in the client's folder.
Can I use it on Mac and Windows?
Yes, with the same licence. Solo covers 1 computer, Studio up to 3.
Can I go back to a client later?
Yes. Open their folder again (or pick them from Recent) and everything is as you left it.
What happens to my work if my plan ends?
The app locks, but the client folders and everything in them stay on your computer. Enter a key again and carry on.
Can I use my own prices and currency?
Yes. Set them in Settings, or import a spreadsheet.
Can my client see prices on the TV?
Only if you choose. The order is hidden from the TV until you click 📺 Show on TV.
Can I use my own music?
Yes, any music you're licensed to play to clients, or your own Spotify Premium account.
How do I cancel?
From your account page (website plans) or your Apple account (App Store plans).
11. Updates, backups and your data
- Updates (website copy): the app checks for a new version when it opens and every 30 minutes. A bar appears: click Install now and the app updates and reopens. Or use Settings › Updates › Check for updates. The App Store copy updates through the App Store.
- Client data lives in each client's folder: the file
PJFC Solutions Presentations session.json(choices, crops, layouts, rooms, the order) plus any saved room and layout pictures. Back up your client folders as you do your photos. - App settings (products, prices, logo, music, your own rooms, licence) are in:
- Mac:
~/Library/Application Support/PJFC Solutions Presentations/ - Windows:
%APPDATA%\PJFC Solutions Presentations\
thumbsandviewsfolders inside are temporary copies; you can delete them to free space and they're rebuilt when needed. - Mac:
- Your photos never leave your computer. The app sends only: your licence key, an anonymous computer ID, the computer's name, Mac or Windows and the app version (to pjfcsolutions.com, for licences and updates); the optional reminder email; and, only when you send an order, the client's name, email, mobile and the order to your own CRM or webhook.
- Privacy policy: pjfcsolutions.com/legal/privacy.
12. Getting help
Email hello@pjfcsolutions.com with your computer (e.g. MacBook Air, macOS 15 or Windows 11), the app version (Settings, bottom left), what you clicked and what you saw. A screenshot helps. Please don't send your licence key in full; the last 5 characters are enough.
PJFC Reveal is made by PJFC Solutions, a trading name of EPQLD Pty Ltd ATF The Nippon Trust QLD (ABN 97 193 310 848). Built-in music: Kevin MacLeod (incompetech.com), licensed under Creative Commons: By Attribution 4.0.